
Moving Paradise

Blog

Your blog category

Indian Interior Design Ideas for Kolkata Homes Traditional Elegance Meets Modern Luxury
Blog

Indian Interior Design Ideas for Kolkata Homes Traditional Elegance Meets Modern Luxury

Indian interior design ideas for kolkata homes traditional elegance meets modern luxury by blending antique wooden furniture with sleek, minimalist lighting and contemporary textures. Achieving this balance requires careful placement of heritage pieces against neutral, light-reflecting backdrops. The final result depends on your room size, natural light availability, and the specific age of your property. Who these interior design ideas suit       This guide serves homeowners in Kolkata living in older colonial-style apartments or newer high-rise condos who want to preserve cultural roots without sacrificing modern comfort. You likely already own a few heirloom pieces, such as a carved rosewood chair or a brass lamp, and you’re now looking for ways to integrate these into a functional, clutter-free space. If you’re seeking a purely minimalist, Scandinavian-style apartment with no cultural markers, this page isn’t for you. We assume you possess a basic floor plan and a budget for either restoration or new custom furniture. Whether you’re working with a small bedroom or a large drawing room, the core strategy remains the same: treat your heritage items as focal points rather than background noise. Factors that shape your design Lighting in Kolkata plays a massive role in how your space feels because the humidity and frequent monsoon rains can make rooms feel dark. If you have large, high-ceilinged windows, you can afford darker, traditional wood tones. If your space is small, stick to off-white walls to keep the room feeling open.   The age of your building is the next key factor. Older homes often have intricate floor tiles or high ceilings that demand respect; don’t cover these features with modern false ceilings. Instead, use them as your design anchor.   Furniture scale is the mistake people make most often. Placing a massive, heavy teak wardrobe in a small, modern bedroom makes the room feel cramped and dated. Always measure your floor space before adding a traditional piece; if the room is under 150 square feet, keep your heritage items to small accessories like stools or wall art.   Humidity control is vital for wood preservation in West Bengal. According to the Forest Products Laboratory research on wood moisture, keeping indoor humidity between 30% and 50% prevents your antique furniture from warping or cracking. Step by step Clear the entire room to see the natural light flow and identify your main focal point, such as a window or a feature wall. Select one traditional piece, like a jhoola or a carved cabinet, to serve as the room’s anchor. Paint the walls in a neutral tone like warm white or soft grey to create a clean, modern canvas. Install modern, recessed LED lighting to illuminate the traditional furniture without adding visual clutter. Add a simple, solid-colored rug to define the seating area, ensuring it doesn’t clash with intricate floor tiles. Replace heavy, dark curtains with light linen or cotton drapes that allow natural light to filter through. Use EPA indoor air quality guidelines to ensure that any new paints or finishes you apply are low in volatile organic compounds. Arrange your seating in a conversational layout that leaves at least 30 inches of space for walking paths. Add a single modern art piece or a large mirror to balance the weight of the antique furniture. The judgement call that separates a professional look from a cluttered one is the “negative space” rule: if a piece doesn’t serve a function or highlight your heritage item, remove it. The variations at a glance The following table outlines common room scenarios found in Kolkata homes and how to manage them effectively. Situation Strategy Effort Level Watch For High-ceiling flat Use tall, dark wood High Dust accumulation Small modern condo Use one accent piece Low Clutter buildup Damp ground floor Use moisture-resistant finishes High Mold growth Open-plan layout Use rugs to zone Medium Visual chaos Narrow balcony Use folding wood furniture Low Rust on joints What separates a good result from a poor one Prioritizing functional flow Experienced designers focus on the paths between furniture. They ensure that even the most beautiful heirloom chair doesn’t block the route to the balcony or kitchen. A good result feels effortless because you can move through the room without bumping into corners. Beginners often crowd a room with too many “statement” pieces, which makes a home feel like a museum rather than a living space. Balancing textures and materials Successful spaces mix smooth, modern surfaces with the rougher, natural grain of aged wood. Using Energy Star lighting helps you achieve this by providing clear, cool light that makes the rich textures of traditional craftsmanship stand out against modern, matte-finish walls. Beginners often use too many glossy surfaces, which creates glare and makes the room feel cold and unwelcoming. What goes wrong, and what to do What you notice What it usually means What to do first How to stop it happening again Wood feels sticky High indoor humidity Use a dehumidifier Improve cross-ventilation Room feels dark Too much dark wood Add a large mirror Use lighter wall paint Furniture wobbles Uneven floor tiles Use felt pads Level the base Cluttered surfaces Too many small items Remove 50% of items Use closed storage Paint peeling Moisture in walls Scrape and reseal Check external drainage Standards for your home   Building standards in Kolkata often require that you don’t modify structural load-bearing walls during renovations. Always check your building’s original blueprints before removing any walls to create an open floor plan. If your home is in a heritage-listed building, you must obtain permission from the Kolkata Municipal Corporation before altering any exterior-facing windows or historical features. If you’re unsure about the structural integrity of your home, hire a licensed structural engineer to assess the space before moving heavy furniture or knocking down partitions. Never assume a wall is non-structural just because it looks thin; if you see cracks appearing after moving furniture, stop immediately and seek professional advice to prevent a safety hazard. What it costs you The
Corner Wardrobe Design Ideas to Maximize Your Storage Space
Blog

Corner Wardrobe Design Ideas to Maximize Your Storage Space

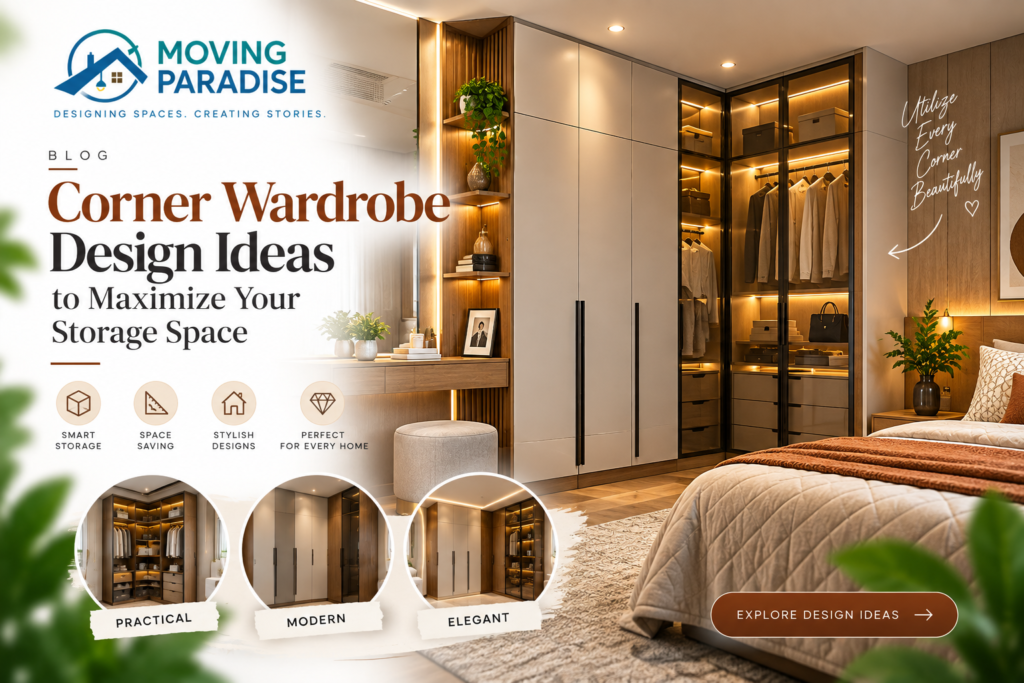
Effective corner wardrobe design ideas rely on L-shaped layouts or diagonal walk-in enclosures to maximize dead space. These designs typically reclaim 20 to 30 percent more storage area than standard reach-in closets. Choosing between these styles depends on your room’s square footage, the depth of your walls, and your specific storage needs. Who this is really for This guide serves homeowners and renters looking to renovate a bedroom or dressing area where floor space is limited. We assume you have a standard rectangular or square room and want to use the intersection of two walls to improve organization. If you’re a professional contractor looking for structural load-bearing calculations, this isn’t the right page; please consult local building codes. If you’re a DIY enthusiast with basic tools, this guide provides the layout principles you need. We focus on maximizing utility without needing custom-built, expensive cabinetry. The primary assumption here is that you possess at least 40 inches of clearance on both walls meeting at the corner to make a functional wardrobe installation worthwhile. Optimizing the room footprint The success of a corner unit depends on how well it fits into your existing floor plan. The most common mistake is ignoring the “swing radius” of bedroom doors or existing furniture. If you place a bulky wardrobe near an entry, you lose valuable floor space. Always measure your available wall length starting from the corner. If you have less than 36 inches on each side, a corner unit will feel cramped and difficult to access. Depth is the second factor. Standard hanging space requires 24 inches of depth. When two 24-inch deep units meet in a corner, they create a “dead zone” where the backs of the units overlap. You can use this space for seasonal items you rarely reach for, or install a rotating carousel to bring items to the front. Lighting also changes the outcome. Corners are naturally dark. If you don’t add interior LED strips, you’ll struggle to see items tucked into the back. The Consumer Product Safety Commission notes that heavy furniture must be anchored to wall studs to prevent tipping, especially when using deep corner units that shift weight forward. Step by step Measure the wall length on both sides of the corner to confirm you have at least 40 inches of clearance. Mark the floor footprint using painter’s tape to visualize how the unit impacts your room’s flow. Select a modular system that allows for adjustable shelving, as fixed units rarely fit perfectly into non-square corners. Assemble the corner frame first, ensuring it’s level; if the floor is uneven, use shims to stabilize the base. Secure the unit to wall studs using heavy-duty brackets to ensure it remains stable when fully loaded. Install hanging rods at the height of 60 inches for long garments or 40 inches for double-stacked shirts. Add a corner carousel or pull-out shelf to the deepest section to make the hard-to-reach space usable. Test the door hinges to ensure they clear adjacent walls or furniture when opened to the full 90-degree angle. The judgment call is choosing between a diagonal door or an L-shaped opening. A diagonal door creates a walk-in effect but takes up more floor space, while an L-shaped opening keeps the room looking larger but requires careful planning to avoid “collision” between two opening doors. Comparing your layout options Several configurations exist for corner storage, and each serves a different room size and organizational goal. Situation Best Design What it takes Watch for Small room L-shaped shelf Low effort Dead space Walk-in closet Diagonal walk-in High effort Floor clearance Shared room Split interior Medium effort Door swing High ceilings Tall towers High cost Stability issues Limited budget Open racks Low cost Dust buildup What separates a good result from a poor one Precision in preparation Experienced installers always check the wall angle before buying parts. Most corners aren’t perfectly 90 degrees, which causes gaps between the wardrobe and the wall. Use a carpenter’s square to check the corner; if it’s wider than 90 degrees, you’ll need to add a filler strip to bridge the gap. A clean finish hides these small variations and makes the unit look like a permanent, custom-built feature rather than a store-bought box. Logical internal organization Good design focuses on the “reach zone.” Place daily-use items between 30 and 60 inches from the floor. Keep the very corner of the wardrobe for items you use once a month, such as off-season coats or extra bedding. When you pack the deep corner, use clear bins so you can see what is inside without pulling everything out. The University of Kentucky suggests that effective storage relies on vertical space management to keep the floor clear. What goes wrong, and what to do What you notice What it usually means What to do first How to stop it happening again Door hits wall Wrong hinge type Adjust hinge screw Install door stopper Unit wobbles Uneven floor Add wood shims Use wall anchors Dark interior No lighting Add battery LEDs Install wired lights Hard to reach Poor depth use Add carousel Use pull-out bins Gaps at wall Non-square wall Add filler strips Seal with caulk Essential installation standards Building codes and safety standards determine how you should mount your wardrobe. In the United States, the American National Standards Institute provides guidelines for furniture stability that you should follow to avoid injury. Always use the mounting hardware included with your unit, and if the wall is drywall, ensure you drive screws directly into the wooden studs. Never rely on plastic wall anchors for heavy wardrobes, as they can pull out under the weight of clothing. If your floor is carpeted, ensure the unit is properly shimmed and anchored to the wall studs to maintain stability. Any unit, especially those with drawers or doors, should be secured to the wall to prevent tipping. What it costs you The cost of a corner wardrobe varies based on your choice of materials and

LED Panel Design for Drawing Room: Expert Lighting Guide
Blog

LED Panel Design for Drawing Room: Expert Lighting Guide

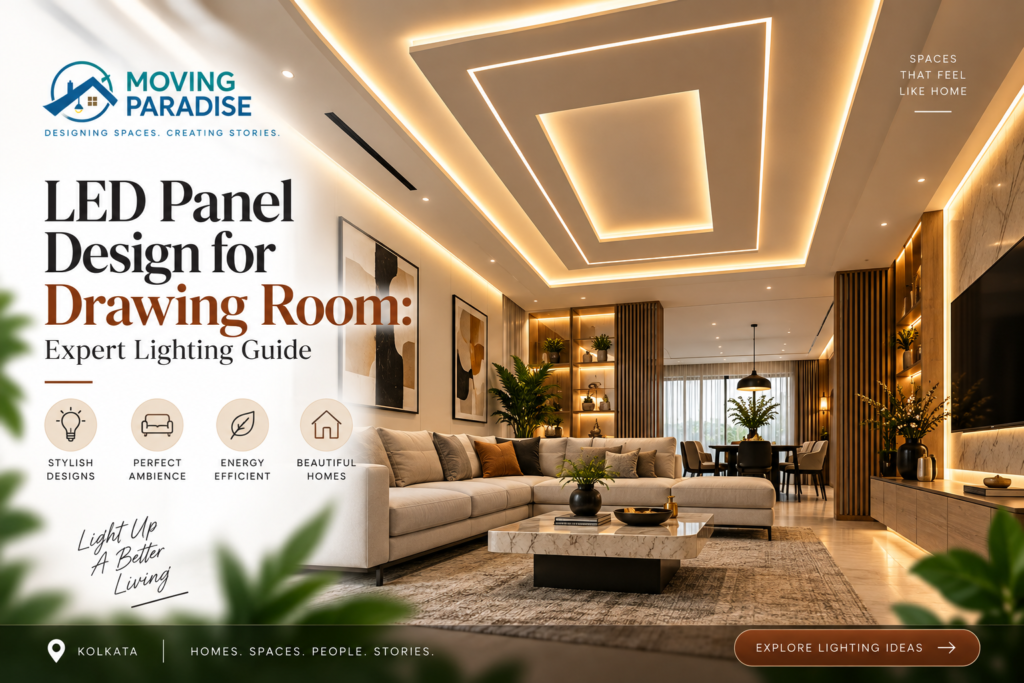
Planning an led panel design for drawing room requires a 2-by-2 foot or 1-by-4 foot flat fixture rated between 3000K and 4000K color temperature, giving you 30 to 40 lumens per square foot across the floor. A standard 12-by-16 foot room needs roughly 6,000 total lumens, which you can deliver using four 15-watt fixtures spaced evenly across the ceiling drywall. This setup suits homeowners who want clean, modern ceiling lines without deep false ceiling framing. What you’ll need You’ll need specific hardware and basic measuring gear before cutting any drywall or running cable: Edge-lit or back-lit LED flat panels: Choose standard 24-by-24 inch or 12-by-48 inch panels. Thin edge-lit units slip into shallow false ceilings, while back-lit models need at least 4 inches of interior depth to prevent bright spots. Recessed mounting frames or surface kits: Match the frame size to your chosen panel. Surface-mount aluminum frames work on solid plaster or concrete ceilings where you can’t cut recessed openings. LED driver: Look for an electronic low-voltage (ELV) or 0–10V dimmable driver matching your fixture’s wattage. Non-dimmable drivers will flicker or buzz if wired to a standard wall dimmer switch. 14/2 NM-B electrical wire: Use standard copper non-metallic sheathed cable for a 15-amp lighting branch circuit. Drywall jab saw and laser level: A self-leveling cross-line laser keeps your layout square to the room’s main entry wall. Non-contact voltage tester: Keep a basic test pen on hand to confirm power is dead at the fixture box. Wire nuts and conduit connectors: Rated for 14-gauge copper conductors to secure connections inside the panel’s metal junction compartment. You can substitute a surface-mount frame for a recessed drywall bracket, but you can’t swap a standard incandescent rotary dimmer for an LED-rated dimming switch without risking loud electronic buzzing. Working inside your main breaker box requires a licensed electrician to avoid electrical fire risks. Step-by-step Measure your room floor dimensions with a tape measure to calculate square footage, multiplying length by width to find total light requirements. Aim for 30 to 40 lumens per square foot for living spaces, and check product packaging according to the FTC Lighting Facts label to verify actual lumen output rather than relying on wattage alone. Mark the center point of your ceiling using chalk or a cross-line laser, then measure outward in a balanced grid. If your ceiling height is 9 feet, keep your fixtures spaced roughly 4.5 to 5 feet apart from one another and 3 feet away from side walls. Trace the inner edge of your recessed mounting frame directly onto the ceiling drywall with a pencil. Double-check behind the drywall with a stud finder so you don’t cut into wooden joists or air ducts. Cut along your pencil lines with a manual jab saw, angling the blade slightly inward to keep the hole snug around the panel housing. Shut off power at the main electrical panel, then confirm the circuit is dead at the ceiling box using your non-contact voltage tester. Careful: If the tester beeps or flashes red near the ceiling wires, stop immediately; check your breaker panel labels and re-test until the circuit shows zero current. Run your 14/2 NM-B wire from the wall switch box through the ceiling framing into the fixture’s integrated junction box. Strip 3/4 inch of insulation from the black, white, and bare copper wires using your wire stripper. Secure your connections by twisting black to black (line), white to white (neutral), and bare copper to the green ground screw using approved wire nuts. Connect the low-voltage DC leads from the driver to the panel face via the quick-connect clip. Tip: Tuck all mains-voltage AC wires completely inside the metal driver enclosure so they don’t pinch against the edge of the drywall cutout. Push the spring-loaded retention clips upward against the sides of the panel housing and lift the unit straight into the drywall opening until the clips snap flat onto the upper side of the ceiling board. Connecting your lighting circuit directly to the home’s primary service breaker panel requires an experienced electrician to maintain local building safety codes. Ceiling layouts by room size Room dimensions and ceiling construction dictate how many panels you need, how you mount them, and the labor required. Room Type and Size Total Installation Time Primary Difference Detail to Monitor Compact drawing room (10 x 12 ft) 2 to 3 hours Two 1×4 ft slim panels placed parallel Driver heat accumulation in small ceiling cavities Standard living space (14 x 18 ft) 4 to 6 hours Four 2×2 ft square panels in a balanced box grid Spacing from ceiling fan blades to prevent strobing shadows Open-plan formal hall (18 x 24 ft) 6 to 8 hours Six to eight 2×2 ft panels zoned on separate switches Total wattage draw across long circuit wire runs Solid slab concrete ceiling (Any size) 5 to 7 hours Requires surface-mounting brackets instead of cutouts Visual profile height of external aluminum framing It’s safer to install fewer panels on a dimmable circuit and add accent lamps later than to cut too many fixture holes across your ceiling. How to tell you did it right A correct installation produces a smooth, continuous wash of glare-free light across your furniture with no dark corners or visible shadows behind the panel frame. The outer metal flange sits flush against the drywall board without sagging, gaps, or light escaping through the sides. When you flip the wall switch, the panels should light up instantly without audible buzzing, delay, or visible stepping between brightness settings. A poor result shows noticeable dark spots between panels, harsh glare when seated, or a high-pitched hum whenever you dim the circuit. Harsh glare happens because flat panels throw wide 120-degree light beams; if they sit too close to high-gloss walls or polished tile floors, the light bounces directly into your eyes. You can prevent this by keeping edge-lit panels at least 30 inches away from side walls and sticking to a warm 3000K or 3500K color range

Blog

Kitchen Trolley Colour Combination: Best Pairings for Your Home

The best kitchen trolley colour combination for most homes is warm off-white on top paired with slate gray on lower drawers because it hides daily cooking marks while keeping narrow rooms bright. If you have an open kitchen layout with large windows, an all-matte navy pairing wins instead because direct sunlight balances dark surfaces. Comparing your kitchen trolley colour combinations Photo: www.asenseinterior.com on Google   Choosing the right finish balances daily cleaning effort against room brightness. The comparison below covers the most reliable options for modular setups. Method How long Effort Cost Best for Dual-Tone Neutral 1 to 2 days Low Medium Small, narrow galleys Single Deep Matte 1 day Medium High High-light open layouts Wood Grain Accent 2 to 3 days High Medium Traditional warm designs Two-tone light upper and dark lower setup A two-tone scheme uses light panels above the waistline and deep tones on base pull-outs. This keeps food splatters off fragile shades. Measure lower baskets and map base drawer fronts for dark charcoal or deep brown laminate. Fit upper shutters with soft ivory or warm white laminates to bounce ceiling light. Align edge band tapes using a 2 mm PVC trim to seal every exposed core against damp air. Clean the laminate surfaces with a damp microfiber cloth and neutral soapy water once the adhesive has fully set. This layout hides ground-level grease near the stove while visually widening tight cooking spaces. It lets homeowners run warm lighting without making the room look yellow. Its trade-off is the visible seam where dark base units touch pale counters, which shows dust lines quickly. Applying high-pressure laminates requires proper contact adhesives that emit strong fumes during curing, so keep windows open or hire a certified installer to avoid breathing toxic solvents. Single saturated deep tone across base units A single deep palette wraps every lower trolley face in one solid color like forest green or navy blue. It creates a seamless look across long counters. Sand drawer faces lightly with 220-grit paper to remove factory sheen before applying primers. Coat the fronts with an anti-fingerprint acrylic or matte PU finish using a fine foam roller. Allow the manufacturer-recommended drying time between coats in a well-ventilated room. Mount brushed brass or steel handles using a 96 mm center-to-center drill template. This approach hides scuff marks from foot traffic and creates an upscale look in modern flats. The solid surface also masks gaps between uneven drawer panels. Its primary weakness is poor light reflection, which makes dim, windowless rooms feel small. Using solvent-based polyurethane paints presents safety hazards during spray work, so review the OSHA personal protective equipment standards to ensure safe handling, or hire a professional finishing team. Natural timber grain paired with muted earthy tones Photo: www.asenseinterior.com on Google   Combining natural wood patterns with sage green or soft beige softens hard steel wire baskets. The grain texture adds depth to long cabinet runs. Select moisture-resistant grade ply core boards backed with natural teak or walnut veneer. Apply a food-safe polyurethane clear sealer across the veneer in two thin layers. Paint adjacent pull-out panels in an earthy, flat sage shade using moisture-tolerant enamel. Allow the entire assembly to cure for 48 hours before loading heavy iron cookware. The wood pattern disguises minor scratches from utensils and gives the room an organic feel. It pairs well with warm stone counters like Indian granite. However, real wood veneers swell if exposed to water leaks under sinks. If you prefer high-gloss monochrome white throughout, install high-powered task lighting, but wipe it twice daily since yellow cooking oil coats shiny surfaces immediately. Which one should you use? If you’re in a hurry, pick the two-tone neutral scheme because off-the-shelf laminate sheets in white and gray are always in stock. If you’re doing this for the first time, choose the wood grain and earthy tone balance because natural textures hide small installation flaws and edge misalignments. When you want the best possible result whatever it takes, choose the single deep matte tone with custom hardware because seamless drawer banks give modern apartments a luxury look.   The trade-off comes down to light versus upkeep. Darker cabinets save cleaning time after heavy frying, but they demand brighter bulbs overhead. Light cabinets keep smaller rooms airy, but they force you to clean handles daily. The rules that apply whichever way you choose Every cabinet installation must follow base moisture and volatile organic compound rules. Always verify that sheet materials meet emission standards set by the EPA formaldehyde standards for composite wood to prevent indoor chemical buildup.   Before starting, check that your masonry walls are dry and free from seepage. During work, confirm every drawer runner sits level using an 18-inch spirit level, or drawers will scrape against side frames.   If damp walls show white salt patches, don’t cover them with wood panels; consult a waterproofing specialist first. Once installed, coat internal screws with silicone grease to stop rust caused by kitchen steam. Frequently asked questions Photo: www.asenseinterior.com on Google Can I use white laminates on lower kitchen drawers? No. White laminates on bottom drawers pick up oil stains, shoe scuffs, and water drips within days. Keeping them clean requires daily scrubbing with harsh chemicals, which ruins the surface layer. Choose white for wall cabinets and place darker tones on base drawers instead. What is the most durable finish for Indian kitchens? High-pressure laminate with a thickness of 1 mm is the most durable option. It resists turmeric stains, steam heat, and rough handling better than acrylic sheets or thin wraps. Wipe it with warm water and mild soap to keep the color fresh. How do dark cabinet colors affect small spaces? Dark colors absorb artificial light, making low-ceiling rooms feel cramped. If your room is under 70 square feet, keep dark shades limited to base pull-outs below the counter. Pair them with pale walls to maintain balanced light levels. Does matte laminate show oily fingerprints easily? Yes. Standard matte laminates show oil

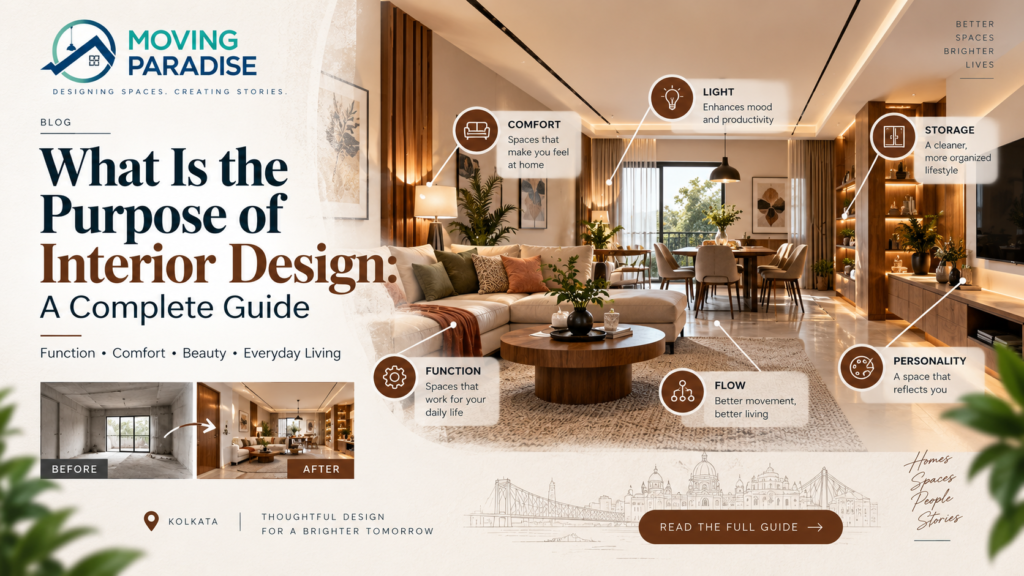
What Is the Purpose of Interior Design: A Complete Guide | Moving Paradise
Blog

What Is the Purpose of Interior Design: A Complete Guide | Moving Paradise

At its foundation, the purpose of interior design is to improve how people live and work inside an indoor environment by shaping its physical structure, airflow, lighting, and usability. It turns raw square footage into an efficient, safe, and comfortable setting that meets daily human needs. Defining the Core Purpose of Interior Design Interior design solves practical layout problems while supporting human well-being. It goes far beyond surface-level decoration. A professional designer analyzes how a room functions, reviews building codes, and plans how furniture, walls, and equipment interact with the people using them. Good design helps you move easily, work without physical strain, and rest without unnecessary distraction. It also balances safety requirements with structural limits. While a simple coat of paint changes the look of a room, interior design changes how that room operates. How Spatial Layout Influences Human Behavior The arrangement of physical objects alters how you feel, how fast you walk, and how long you stay in a room. When an interior uses clear boundaries and open paths, stress drops because the brain quickly maps out the room. Optimizing Flow and Movement A well-planned space lets people move naturally between entryways, seats, and work surfaces without squeezing past furniture. The standard walkway requires a minimum width of 36 inches so two people can pass each other comfortably, though tighter residential spots can drop to 30 inches if space is limited. If a room has high foot traffic, leave at least 48 inches of open floor between kitchen counters and islands.; if the area is a private desk nook, 32 inches is sufficient to pull out an office chair. A frequent mistake is buying an oversized sectional sofa for a small living room, which costs homeowners hundreds of dollars in restocking fees when it blocks heating vents and doorways. Creating Zones for Specific Activities Dividing an open layout into clear zones helps the brain switch tasks smoothly. Large open plans often create noise spillover and visual chaos, making it hard to focus on complex jobs. Zone Type Primary Function Minimum Clearance Required Key Design Elements Focus Zone Solo work, reading, quiet study 36 inches behind desk Task lamp, acoustic paneling, storage Social Zone Dining, group conversation 48 inches around table edges Central pendant light, wide seating Transition Zone Entryway, hallway, movement 36 to 42 inches wide path Durable rugs, wall hooks, floor runner The Psychological Impact of Color and Light Lighting levels and surface hues directly change human mood and alertness. Natural daylight sets the body’s internal clock, which regulates hormone production, focus, and nighttime sleep cycles. In rooms with little sunlight, electric fixtures must take over this job by changing color temperatures across the day. Cool white lights around 4000K boost daytime concentration, while warm lights near 2700K help muscles relax in the evening. Paint choices carry measurable emotional effects. Soft blues and muted greens calm visual tension because they reflect wavelengths that human eyes process with minimal strain. Saturated reds raise heart rates and create urgency. Designers evaluate lighting choices through guidelines established by the U.S. General Services Administration, which details how visual comfort affects daily worker efficiency. Balancing Aesthetics with Functional Utility A room that looks stunning on camera but fails during daily chores is an expensive failure. Functional design means chairs support healthy posture, kitchen counters sit at comfortable heights, and storage hides clutter before it piles up. Every visual choice carries a functional trade-off: a glossy marble tabletop looks luxurious, but it scratches easily and stains when exposed to acidic foods like lemon juice or coffee. In contrast, matte quartz handles heavy abuse but lacks the natural veining of real stone. If you want durability over visual prestige, select commercial-grade synthetic fabrics; if you want historic charm, pick untreated wood and accept regular oiling and surface dents. The Role of Sustainability and Material Selection Modern interior design protects the health of the planet and the people breathing indoor air. Many paints, adhesives, and particleboards release volatile organic compounds (VOCs) that irritate lungs and cause long-term headaches. Designers specify products certified under low-emission standards to keep indoor air clean. The U.S. Environmental Protection Agency provides clear guidance on how these chemicals collect in sealed rooms and how proper ventilation removes them. Choosing sustainable materials also lowers energy consumption. Heavy linen drapes block winter drafts and summer heat gain, taking stress off heating units. This performance varies by fabric weight and window orientation—check the manufacturer’s thermal backing label before buying. Furthermore, designers follow accessibility and safety measures detailed in the ADA Standards for Accessible Design to ensure doors, switches, and countertops work for people of all physical capabilities. Frequently Asked Questions What is the difference between interior design and interior decorating? Interior design involves spatial planning, architectural changes, building code compliance, and mechanical layouts. Decorating focuses strictly on the surface aesthetics of an existing room, such as choosing paint swatches, window draperies, throw pillows, and decorative accessories. How does interior design affect property value? Interior design raises property value by correcting awkward room layouts, modernizing kitchen workflow, and improving built-in storage. Homes with functional, code-compliant updates sell faster because buyers don’t need to spend extra money tearing down poorly placed walls or rewiring dark rooms. Can interior design improve mental health in a workspace? Yes, interior design improves mental health by reducing ambient noise, bringing in natural light, and setting up ergonomic workstations. Lower background noise reduces daily mental fatigue, while well-placed plants and clear sightlines lower stress hormones during demanding work hours. What are the most important principles of universal design? Universal design focuses on seven principles: equitable use, flexibility in use, simple and intuitive operation, perceptible information, tolerance for error, low physical effort, and appropriate size and space for approach. Together, these rules ensure that an environment stays fully usable for children, aging adults, and individuals with disabilities without requiring separate adaptations. Final Thoughts Ultimately, your home shouldn’t just look good; it should support your well-being every single day. By focusing on

Blog

Top Home Renovation Service Providers in Kolkata: Our Guide | Moving Paradise

Full-service design-and-build firms are the top home renovation service providers in Kolkata for most homeowners because they handle architectural plans, labor, and municipal permits under one contract. Independent specialized contractors win when you only need a single room updated, like waterproofing a damp bathroom, without paying full design overhead. Comparing Kolkata home renovation service providers Choosing how to remodel an apartment or standalone house across Kolkata comes down to your budget and time. Method How long Effort Cost Best for Full-service design firms 8 to 16 weeks Low High Complete flat remodeling Independent local contractors 4 to 10 weeks High Medium Single-room updates Direct freelance labor 6 to 14 weeks Very high Low Skilled homeowners on a budget Turnkey corporate platforms 6 to 12 weeks Low High Standardized modular builds Full-service interior design firms A full-service firm manages the entire project from concept drawings to physical handover through a structured sequence. Book an on-site survey where designers take physical measurements of your rooms over 2 hours. Review 3D layout options, approve material swatches, and sign the finalized scope within 14 days. Hand over your keys for civil demolition, masonry, wiring, and false ceiling setup across 6 to 10 weeks. Complete modular furniture installation and deep cleaning during the final 10 days before handover. These teams deliver cohesive aesthetics and assign a site supervisor who manages daily worker attendance. You don’t have to source materials or negotiate with multiple trades. The clear drawback is total expense, as management fees add a steep premium. Structural alterations in multistory apartments require formal approval from an engineer registered with the Kolkata Municipal Corporation to prevent damage to load-bearing columns. Independent specialized contractors Hiring an independent civil or interior contractor puts you in charge of material purchases while they supply skilled labor. Walk the space with the contractor to list tasks, requiring 1 day for a written quote. Purchase your own raw materials—such as cement, tiles, and wires—delivered before work begins. Inspect structural progress every 2 to 3 days to verify alignment, plumbing lines, and grout lines. Authorize final labor payments over a 3-stage milestone schedule as each task finishes. This method gives you complete control over raw material brands and costs significantly less than design agencies. You can pick premium tiles without paying agency markups. However, its major weakness is coordination: if your plumber finishes late, your tiler won’t begin, causing long delays. This route isn’t for busy working people who can’t visit the job site every other morning. Managing direct freelance trades Managing individual carpenters, masons, and painters directly requires daily supervision on the work floor. Hire individual tradesmen based on personal recommendations for specific tasks. Measure rooms yourself to calculate exact raw supplies needed for each stage. Buy all hardware, adhesives, and paints directly from local wholesale distributors. Supervise workers daily for 8 hours per shift to track progress and verify work quality. This hands-on route keeps labor expenses to the absolute minimum. You see every rupee spent and avoid middleman cuts. The weakness is high personal stress and zero schedule guarantees if workers abandon the job midway. A common mistake people make is skipping surface moisture testing before painting; peeling paint ruins the walls within months and forces an expensive repaint. Turnkey corporate platforms offer a fourth path with fixed factory pricing, but their rigid modular designs rarely fit older, uneven heritage walls in North Kolkata. Which one should you use? If you’re in a hurry, pick a turnkey corporate platform because their factory-made modules arrive pre-built for fast installation. If you’re doing this for the first time, hire a full-service design firm so a project manager catches structural and plumbing errors before they become costly hazards. If you want the best possible result whatever it takes, choose an architect-led independent team paired with a custom carpentry contractor to build unique spaces tailored to your floor plan. The core trade-off balances your free time against direct costs. Saving money requires spending hours negotiating with labor and tracking material deliveries. Paying a firm frees your schedule, but you pay a higher markup for that convenience. The rules that apply whichever way you choose Every renovation in Kolkata must follow structural safety limits to protect older brickwork and shared multi-unit frames. The Bureau of Indian Standards publishes building guidelines under the National Building Code of India, which restricts cutting into structural beams or altering shear walls. Before starting demolition, map existing electrical conduits and shut off main utility valves. During the rough-in stage, check concealed plumbing lines using a manual pressure test to spot hidden leaks before tiling over them. Any new appliance wiring should incorporate energy-efficient fixtures certified under the Bureau of Energy Efficiency standards to avoid overloading older residential distribution boards. When work wraps up, inspect all silicone seals around sinks and balcony drains. Never alter exterior load-bearing walls or main sewer lines yourself; hire a licensed structural engineer to oversee any major layout changes. Frequently asked questions Can I renovate my Kolkata flat without society permission? No, most residential housing societies require formal written approval before you begin. You’ll need to submit your layout plans, worker identification lists, and work schedules to the management committee. Unapproved drilling can lead to immediate site shutdowns, entry bans for workers, and hefty association fines. How long does a full home renovation take? An entire flat renovation usually takes between 8 and 16 weeks, depending on structural changes. Simple cosmetic updates like painting take about 2 weeks, while major bathroom overhauls require 3 to 4 weeks. Unplanned structural dampness discovered behind old plaster will add extra days to your timeline. What happens if workers damage a load-bearing column? Structural damage can cause wall cracks, floor sagging, and building collapse risks. If a contractor damages a column, stop all work immediately and hire a licensed structural engineer to inspect it. Remediation requires steel propping, concrete jacketing, and formal municipal reporting, which adds heavy unexpected repair expenses. Why do walls in Kolkata homes develop damp

Blog

Modular Kitchen Under 50000 Kolkata: A Realistic Budget Guide | Moving Paradise

Getting a modular kitchen under 50000 Kolkata works only as a semi-modular upgrade for a straight layout running 6 to 8 linear feet. This budget covers basic base shutter fronts, wire pull-out baskets, and external labor on a pre-built civil slab. This guide explains which materials survive the city’s damp monsoon air, what hardware to pick, and the exact compromises needed to prevent rapid water rot. Planning your modular kitchen in Kolkata on a budget A low-budget kitchen build in West Bengal is a semi-modular retrofit. In this setup, carpenters build cabinet carcasses or shutter frames around existing concrete counters rather than installing factory-made boxes. The system uses basic shutter doors, external hinges, and sliding wire racks. It suits small apartments, rental properties, and older flats across Kolkata where solid civil slabs already exist. Many people believe 50,000 rupees buys a complete, factory-finished, full-height modular unit with acrylic finishes and hydraulic lifts. It does not. A budget setup skips overhead wall cabinets entirely to save money. The structure relies on your existing stone slab to carry the heavy load of cookware and wet grinding tools. In high-humidity climates, wood absorbs water from the air, which makes cheap particle board expand and fall apart. Because Kolkata experiences high moisture levels, picking the wrong core sheet guarantees swelling within months. The basic method Measure your existing concrete counter run; keep the project scope strictly between 6 and 8 linear feet to prevent labor costs from exceeding your cap. Inspect the underside of the concrete slab for dampness, then seal the masonry wall with an acrylic waterproof coating 24 hours before cabinet assembly begins. Purchase commercial-grade boiling water resistant (BWR) plywood sheets marked with standard quality stamps directly from a local timber timberyard. Hire a local carpenter on a fixed daily-wage or per-square-foot contract rather than paying a modular brand’s design agency. Build the base framework directly beneath the stone counter, leaving a 2-inch gap above the finished floor to protect the wood from floor-washing water. Install grade 202 or basic grade 304 stainless steel wire baskets inside 3 designated drawer sections using standard ball-bearing drawer slides. Mount 0.8 mm thick matte laminate on the external door faces using contact adhesive, and press each sheet flat for at least 12 hours. Screw standard magnetic catches and basic stainless steel handles onto each finished door front. The single judgement call that separates success from total failure is choosing between carcass boxes or simple face-frames: if your slab is bone-dry, build internal wooden carcasses; if your kitchen floor catches standing water, fix frame runners directly to the concrete legs and skip the bottom wooden base entirely. For any required gas pipe rerouting, hire an authorized technician from your local distributor like Indian Oil instead of moving pipes yourself. Key numbers and settings at a glance Planning every element around strict dimensional and material limits keeps expenses within bounds. Situation What to use How long What to watch for Straight counter (6 to 8 ft) 16 mm BWR plywood + 0.8 mm laminate 4 to 6 working days Gaps between stone edge and frame L-shaped corner space Open shelves (skip blind corner units) 1 to 2 working days Carpenter charging double for corner labor Sink base cabinet PVC foam board instead of plywood 1 day installation Plumbing leaks soaking wood edges Daily utensil storage Plain wire pull-out baskets 3 to 5 hours fitting Channel screws pulling loose from soft frames High-moisture areas Grade 304 stainless steel hardware 2 hours fitting Grade 202 steel rusting near salt or spice jars What separates good results from bad ones Photo: www.livspace.com on Google Edge sealing and alignment Long-lasting budget setups depend entirely on edge banding. Moisture in Kolkata easily penetrates exposed plywood edges behind the sink and along baseboards. Skilled carpenters apply 2 mm thick PVC edge tape with high-strength waterproof glue along every cut edge, even surfaces hidden against the wall. Leaving any cut edge raw to save a few hundred rupees allows steam and damp floor water to bloat the ply core, which ruins the hinges within a single season. Hardware selection and order of work The trade-off here is obvious: choosing cheap hardware lets you afford wider cabinets today, but cheap slides rust and jam within months. Experienced installers mount the structural side battens first, level the drawer slides with a spirit level, and only then cut the front shutter panels. Skipping this step leads to sagging drawers that scrape against the tiled floor. Let the counter base cure completely before attaching doors so the hinge alignments stay square. Common problems and quick fixes Photo: www.youtube.com on Google Basic kitchen components present minor mechanical issues when exposed to heat and moisture. What you notice What it usually means What to do first Shutter hits the outer frame Hinge screws have pulled loose Tighten center screw or refill hole with wood splinters Wire basket sticks on track Grease and dust have choked the bearings Clean slides with dry brush and apply dry silicone spray Laminate bubbles near stove High heat weakened contact glue Press down using a warm cloth over a flat wooden block White powder along raw edges Termites or damp fungus attacking core Apply liquid chlorpyrifos treatment along all bare seams Structural and Material Standards Material durability depends on official certification rather than verbal promises. Plywood used in wet kitchen areas should meet standard manufacturing codes established by the Bureau of Indian Standards for moisture and weather resistance. Look for legitimate IS:303 markings stamped across the boards. Never allow workers to bypass your building society’s plumbing guidelines when shifting sink lines. If the drain pipe requires cutting through structural floor beams, stop the work immediately and leave the sink in its factory location. Maintaining your kitchen surfaces Photo: psgroup.in on Google Keep the surfaces dry to maximize their usable lifespan. Laminate door faces need a weekly wipe-down using a damp microfiber cloth dipped in mild dish soap, followed by a dry cotton towel. Never

Commercial interior designer in Kolkata
Blog

Commercial interior designer in Kolkata

Hiring a commercial interior designer in Kolkata gives business owners a fully managed workspace setup, with standard office fit-outs usually taking between 6 to 16 weeks depending on square footage and custom joinery. The total timeline changes based on building permissions, raw site conditions, and electrical load approvals. This guide explains how to plan your layout, handle municipal regulations, avoid expensive material mistakes, and schedule site work properly. What a Kolkata commercial interior designer actually does A commercial designer plans, builds, and furnishes business properties like offices, retail shops, and medical clinics. Unlike residential work, commercial projects focus on customer movement, staff efficiency, durability, and strict safety codes. Many people mistakenly believe that commercial design is just decorating with trendy colors and modern furniture. In reality, it centers heavily on utility planning, acoustics, lighting levels, and airflow engineering. A major trade-off in business interiors involves choosing between open-plan desks and partitioned cabins. Open plans cut construction expenses and speed up cooling, but they raise ambient noise. Glass cabins preserve line-of-sight and reduce sound, yet they increase glass framing costs and require dedicated air-conditioning ducts. If your lease is shorter than three years, choose modular, demountable furniture systems; if you hold a long-term lease or own the property, invest in durable, built-in masonry and custom carpentry. This process isn’t for residential property owners wanting domestic living room woodwork. The basic method Inspect the base build to log structural pillars, beam drops, window openings, and existing plumbing taps. Measure the total floor area with a laser measuring tool to establish accurate boundary dimensions. Draft a preliminary space layout marking clear walkways of at least 36 inches between workstation rows. Place high-traffic zones like reception counters and pantries near entrance doors. Submit technical layout drawings to the commercial property owner or building society to secure written fit-out approvals. Run primary electrical conduits across floors and slab ceilings. Keep low-voltage data cables separated from 230-volt mains power wiring by at least 12 inches to prevent signal interference. Install fire safety infrastructure. Mount automatic water sprinkler heads spaced strictly between 8 to 12 feet apart beneath the structural slab or suspended framework. Frame false ceilings using galvanized iron channels hung from ceiling anchors, followed by cutouts for air-conditioning cassettes and recessed panel lights. Set up modular modular partition walls, lay commercial-grade floor tiles or vinyl planks, and wire up desk power grommets. Carry out final electrical load testing across all switchgear before moving loose chairs, desks, and branding signs onto the floor. The single judgement call that separates a smooth project from a failure is balancing HVAC duct routing with structural ceiling beams before closing false ceilings. Altering sheet-metal ducting after gypsum boards are screwed in creates massive rework expenses. For main electrical board terminations, hiring a licensed electrical contractor is mandatory to avoid serious fire hazards and legal liabilities. Key numbers and settings at a glance Planning a workspace requires matching the correct material, illumination, and build time to your specific commercial category. Situation What to use How long What to watch for IT office desk bay Heavy-duty commercial nylon carpet tiles 4 to 8 weeks Wire routing capacity inside raceways High-footfall retail store Full-body vitrified tiles with 600x1200mm sizing 6 to 10 weeks Slip-resistance ratings near entrance steps Fine dining restaurant Commercial vinyl planks with sound-dampening core 8 to 14 weeks Floor grease resistance and wet cleaning tolerance Executive boardroom Acoustic fabric wall panels over mineral wool 3 to 5 weeks Reverberation time and ceiling speaker coverage Medical diagnostic clinic Seamless anti-microbial homogeneous vinyl sheets 5 to 9 weeks Chemical staining from sanitizers and reagents Storage server room Raised access flooring with metal-cementitious panels 2 to 4 weeks Static electricity buildup and cable clearance What separates good results from bad ones Infrastructure planning before styling Experienced planners secure the mechanical, electrical, and plumbing engineering designs before picking paint colors, veneers, or fabrics. They verify ceiling heights, measure incoming mains power amperage, and assess chilled water supplies. When teams pick decorative wall laminates first while ignoring cable runs, contractors often have to cut open finished surfaces later to add extra wall outlets. Material endurance and maintenance paths Commercial spaces experience heavy foot traffic, constant chair rolling, and daily industrial cleaning. Successful setups use high-pressure laminates rated for high-wear areas and commercial-grade nylon upholstery. Builders check alignment on door closers, cabinet hinges, and floor-spring hardware partway through installation. They leave building perimeter expansion gaps intact and avoid gluing delicate, domestic-grade wallpaper in narrow corridors where luggage, trolleys, or chairs bump into walls. Common problems and quick fixes Photo: www.ashiyaainterio.com on Google Commercial renovation projects frequently encounter site-level bottlenecks that demand prompt physical adjustments. What you notice What it usually means What to do first Circuit breaker trips under full staff load Uneven phase distribution across distribution board Measure current on each phase using a clamp meter Strong echo during video calls Hard surfaces reflecting sound waves Mount fabric-wrapped acoustic panels on opposite walls Musty smell from air vents Poor fresh-air intake or blocked condensate drains Clear the drain trap line and adjust damper airflow Floor tiles lifting near glass frontage Thermal expansion from direct sun heat Cut and replace perimeter grout with flexible silicone Flickering recessed panel lights Driver voltage mismatch or loose neutral connection Verify incoming line voltage and tighten terminal blocks Fire safety and building compliance Commercial spaces must follow regional building and life-safety codes. The Bureau of Indian Standards sets national technical requirements through the National Building Code of India. These guidelines establish minimum corridor widths, fire separation requirements, and mandatory emergency exit doors based on occupant counts. Emergency escape routes must stay entirely free of built-in storage units or loose furniture. Commercial premises also need official clearance from the West Bengal Fire and Emergency Services to ensure adequate hydrant points, fire alarms, and portable extinguishers are active. All main electrical distribution equipment, switchboards, and protective breakers must comply with installation limits published by the Central Electricity Authority. If a site

Low budget interior designers in Kolkata
Blog

Low budget interior designers in Kolkata

Hiring Low budget interior designers in Kolkata usually costs between 1.5 lakh and 3.5 lakh rupees for a standard 2BHK flat, depending on materials and carpentry choices. That basic range covers essential modular woodwork, painting, and basic lighting setup. This guide explains how to select reliable local professionals, pick durable materials that survive humid weather, and control execution costs without sacrificing build quality. Affordable home design services explained Affordable residential design focuses on smart planning, space saving, and durable materials rather than luxury decorative panels. Local professionals plan your rooms, build modular units, handle electrical work, and paint your walls. The service fits middle-class homeowners and families moving into new apartments who want functional storage without heavy bills. A common misconception is that low-cost design means weak materials that break down quickly. That’s false. Cost savings usually come from skipping false ceilings, avoiding costly veneer polish, and choosing factory-cut laminate finishes. The trade-off is clear: you get durable, simple surfaces instead of carved wooden trims or complex indirect lighting. Moisture damages low-grade compressed board quickly, so reputable local designers use boiling waterproof ply in wet zones like kitchens. The basic method Planning your home requires a clear step-by-step process to prevent unexpected bills. Measure your flat’s carpet area with a 5-meter steel tape, noting exact window and door placements. List your storage needs, limiting wardrobe heights to standard 7-foot frames to avoid custom panel surcharges. Choose commercial MR-grade plywood for dry bedroom areas, but pick IS 710 marine plywood for your modular kitchen and bathroom vanities. Collect itemized written quotes from 3 local designers, checking that labor, raw boards, edge banding, and hinge hardware appear as separate line items. Inspect the designer’s active site in your neighborhood to check board edges, laminate alignment, and hinge smoothness before paying any deposit. Pay a standard booking advance of no more than 10 to 15 percent of the total agreed contract value. Approve a 2D furniture layout draft before allowing carpenters to cut any timber sheet. Release stage payments only after materials arrive at the flat and get verified against your written bill of quantities. The single judgment call that separates good results from bad ones is choosing hardware fittings: cheap hinges rust within months, while branded soft-close hinges keep heavy shutters aligned for years. Electrical line shifts inside concrete columns need a certified structural engineer; never let a general carpenter chip into load-bearing pillars. Key numbers and settings at a glance Planning your project requires matching each room to the right materials and realistic timelines. Situation What to use How long What to watch for Modular kitchen base units 16 mm or 19 mm BWP marine plywood 12 to 18 days Unsealed cut edges absorbing water Master bedroom wardrobe 18 mm MR grade plywood with 0.8 mm inner laminate 10 to 14 days Shutter warping on doors over 7 feet Living room TV unit Wall-mounted MDF or commercial ply with laminate 4 to 6 days Visible hanging wires and loose wall plugs Entire flat wall painting Acrylic distemper or basic interior emulsion 7 to 10 days Damp patches along external exterior walls Kitchen counter backsplash Ceramic tiles up to 2 feet height 2 to 3 days Grout gaps behind the cooking hob Compact shoe rack cabinet 16 mm commercial ply with louvers 2 to 3 days Lack of ventilation causing bad odors What separates good results from bad ones Material checks and planning order Getting good results depends on doing tasks in the right order. Successful projects always finish wet civil tasks first: plumbing, tile work, and wall plastering must dry out completely before wooden boards enter the flat. If raw ply sits on damp concrete, it absorbs moisture and bends. Check every board sheet when the delivery truck arrives. Check the manufacturer stamp on the edge of the plywood sheets to confirm the grade matches your contract. Skipping fancy false ceilings saves money and keeps your rooms cool, since Kolkata’s hot, humid air stays trapped under low artificial ceilings. Hardware and detail control Inspect moving parts during the midway carcass stage. Before laminates are glued down, verify that workers use 0.8 mm or 1 mm high-pressure laminates on the outside and at least 0.6 mm white balancing sheets on the inside. Unbalanced ply bows inward over time. Leave heavy ornamental moldings alone. Straight edges and clean lines cost less labor and collect less household dust over time. The biggest mistake people make is paying 50 percent upfront before materials arrive; untrustworthy contractors disappear or delay tasks, costing families months of rent. If your budget is tight, focus entirely on modular kitchen storage first; if your budget has room, add bedroom wardrobes next. Common problems and quick fixes Small issues often occur during on-site carpentry work, but quick detection prevents permanent damage. What you notice What it usually means What to do first Cabinet doors don’t close evenly Hinge screws have loosened inside the soft core Tighten the hinge adjustment screws with a manual screwdriver Laminate bubbles along sheet edges Poor adhesive spread or high room moisture Press down firmly and apply masking tape; have carpenters add heat Kitchen drawer sticks halfway Dust or sawdust in the roller channels Clean the metal channel with a dry nylon brush and wipe clean White powder under wooden boards Termite or borer activity in untreated core ply Spray an oil-based chemical anti-termite solution into joint holes Paint peeling near skirting boards Moisture creeping up from the flooring joints Stop wall painting until the source leak is sealed by a plumber Building codes and safety limits Interior projects must follow local safety and environmental standards. Kitchen gas pipeline modifications must comply with safety regulations set by the Petroleum and Natural Gas Regulatory Board to prevent domestic fire hazards. Never conceal flexible rubber LPG hoses behind wooden paneling or sealed kitchen cabinets. Electrical wire loading must match circuit breakers based on national standards published by the Bureau of Indian Standards for domestic wiring safety. Use fire-retardant

traditional indian middle class living room
Blog

Traditional Indian Middle Class Living Room: Timeless Charm Unveiled

Your living room is more than just a space; it’s where memories are made and stories are shared. If you’ve ever wondered how to bring the warmth and charm of a traditional Indian middle class living room into your home, you’re in the right place. Imagine a room filled with simple yet meaningful decor, vibrant colors, and cozy furniture that invites family and friends to gather around. This isn’t about luxury—it’s about comfort, culture, and connection. Keep reading, and you’ll discover how to create a living room that feels truly like home, reflecting the heart of Indian middle class traditions. Key Features Of Traditional Indian Living Rooms Traditional Indian living rooms reflect a unique blend of culture and comfort. These spaces showcase family values through their design and decor. Every element has a story and a purpose. The style highlights warmth and hospitality in the middle-class Indian home. Key features create a welcoming and cozy atmosphere. They focus on natural materials, vibrant colors, and meaningful decorations. The living room is a place to relax and connect with loved ones. It also shows the family’s heritage and taste. Furniture Styles And Materials Wood is the main material in traditional Indian furniture. Teak, rosewood, and mango wood are popular choices. Chairs, sofas, and tables often have intricate carvings. The designs are sturdy but elegant. Seating includes wooden sofas with thick cushions. Jharokha-style chairs and low stools add charm. Furniture balances comfort and tradition. Pieces are often handcrafted by local artisans. Color Palettes And Textiles Colors in traditional Indian living rooms are bright and warm. Reds, oranges, yellows, and golds create a lively feel. Earth tones like browns and greens add balance. Textiles play a big role in color and texture. Cotton, silk, and wool are common materials. Curtains, cushions, and rugs feature traditional patterns. Block prints and embroidery add rich details. Decorative Elements And Artifacts Decor includes brass lamps, wooden masks, and carved panels. Family photos in ornate frames show personal history. Wall hangings and paintings depict Indian myths and nature. Plants in clay or brass pots bring freshness. Handcrafted pottery and traditional idols are common. These elements add character and soul to the room. Credit: www.youtube.com Cultural Significance In Design Choices The design choices in a traditional Indian middle-class living room hold deep cultural meaning. These choices reflect values, beliefs, and history passed down through generations. Every element, from furniture to colors, tells a story about family and culture. Designs often focus on harmony and warmth. They create a space where family members feel connected. The living room becomes a place to welcome guests and show respect for tradition. Symbolism In Decor Decor items in the living room carry symbolic meanings. For example, the use of certain colors like red and yellow represents energy and happiness. Brass lamps and idols symbolize prosperity and protection. Wall hangings often show religious symbols or traditional art forms. These bring positive energy and blessings into the home. Even the placement of furniture follows cultural beliefs about balance and flow. Influence Of Regional Traditions Designs vary across India due to regional traditions. South Indian homes may use wooden furniture with intricate carvings. North Indian living rooms often feature bright textiles and embroidered cushions. Each region adds unique touches based on climate and local customs. These influences keep the living room authentic and respectful of local culture. The mix of styles creates a warm and inviting space for all. Balancing Functionality And Aesthetics Traditional Indian middle-class living rooms reflect a blend of beauty and purpose. Families want spaces that look warm and inviting yet serve daily needs. Balancing functionality and aesthetics is key to creating a room that feels both comfortable and stylish. Every element in the living room plays a role. Furniture, lighting, and storage must work together. The goal is to maintain a neat and welcoming space without sacrificing charm. Thoughtful choices help keep the room practical and attractive. Seating Arrangements Seating in Indian living rooms often includes sofas, chairs, and sometimes floor cushions. Arranging seats to encourage conversation and family gatherings is common. Sofas with simple designs and durable fabric fit well with daily use. Floor cushions add a traditional touch and extra seating for guests. Proper spacing avoids clutter and allows easy movement. Lighting And Ambiance Lighting sets the mood of the room. Soft, warm lights create a cozy atmosphere for evenings. Ceiling lights combined with table lamps offer layered lighting options. Traditional lamps or lantern-style fixtures add cultural charm. Natural light is welcomed during the day to brighten the space and save energy. Storage Solutions Storage keeps the room organized and tidy. Wooden cabinets and shelves store books, decor, and everyday items. Closed storage helps hide clutter, maintaining a clean look. Small tables with drawers provide extra space for essentials. Open shelves display family photos and cultural artifacts, blending function with decoration. Incorporating Modern Touches Incorporating modern touches into a traditional Indian middle class living room adds freshness and style. It keeps the room cozy and functional. The blend of old and new creates a warm, inviting space. Small updates bring big changes without losing cultural charm. Blending Old And New Mix classic wooden furniture with sleek metal or glass pieces. Use traditional fabrics alongside modern patterns. Bright cushions with ethnic prints work well with simple sofas. Display old artifacts on clean, modern shelves. This balance keeps the room lively and elegant. Sustainable Materials And Practices Choose eco-friendly wood and natural fabrics for furniture. Use energy-saving lights to reduce electricity use. Reuse old items by repainting or repurposing them creatively. Plants improve air quality and add natural beauty. These choices protect nature and enhance your living room’s look. Maintaining And Preserving Traditional Charm Maintaining and preserving the traditional charm of an Indian middle-class living room requires care and attention. These living rooms often feature rich wooden furniture, vibrant textiles, and antique pieces. Each element adds warmth and character. Proper upkeep ensures these features stay beautiful and last long. Care For Wooden

Scroll to Top