Moving Paradise

Author name: admin

Blog

simple bedroom design for middle class family

A comfortable, well-organized bedroom doesn’t require a big budget or a big house. For a simple bedroom design for middle class family, the goal is calm, storage, and durability at a price that leaves room in the monthly budget. Most families can refresh a standard 10×12-foot room for somewhere between $400 and $2,500, depending on how much furniture they replace and whether they hire help. The ideas below focus on what actually works in real homes: smart layouts, affordable materials, and small changes that make a room feel finished rather than crowded. Key Takeaways   Photo: www.tostemindia.com on Google Start with layout, not shopping. Measure the room and mark door swings before buying anything; a wrong-size bed wastes more money than a cheap one. Set a realistic budget band. A cosmetic refresh runs $400–$900; a full furniture replacement runs $1,500–$2,500 for a standard room. Buy storage that goes vertical. Tall wardrobes and under-bed bins add more usable space than wide, low furniture in small rooms. Choose washable, neutral textiles. They hide wear, survive kids, and stay in style for years. Light in layers. One ceiling bulb flattens a room; a ceiling light plus two lamps changes the whole feel for under $80. Skip trends that date fast. Bold accent walls and themed bedding cost money and look tired within two years. Simple Bedroom Design Layout for Middle Class Families The most common and expensive mistake is buying furniture first and figuring out where it goes later. A bedroom has fixed obstacles — doors, windows, closets, outlets — and the bed has to work around all of them. Measure these five things first Wall lengths from corner to corner, at floor level. Door swing — how far the door opens into the room. Window position and sill height, so a headboard or dresser doesn’t block light. Closet door type — hinged doors need clearance; sliding doors do not. Outlet and switch locations, so lamps and chargers reach without extension cords. Sketch the room on graph paper at a scale of one square equals one foot. Cut paper rectangles for the bed, wardrobe, and dresser, and move them around until the room “walks” well. You want at least 24 inches of clear walking space between the bed and any wall or furniture. The three layouts that work in small rooms Layout Best for Watch out for Bed centered on the longest wall Square rooms, couples Leaves less room for a desk Bed in a corner Very small rooms, single sleepers One side is hard to make Bed under the window Narrow rooms Drafts and curtain clearance Pro Tip: If the room is under 100 square feet, put the bed against the longest uninterrupted wall and treat the space at the foot of the bed as your only open floor. Everything else lines the walls. Set a Budget You Can Actually Keep Middle-class budgeting is about trade-offs, not deprivation. Decide up front which category you’re in, then protect that number. Scope Typical cost What it covers Cosmetic refresh $400–$900 Paint, bedding, curtains, lamps, rug, hardware Partial upgrade $900–$1,500 Above plus a new mattress or one furniture piece Full replacement $1,500–$2,500 Bed frame, mattress, wardrobe, dresser, lighting, textiles A few rules that keep costs down without looking cheap: Spend on the mattress, save on the frame. You use the mattress every night; a simple metal platform bed does the same job as an upholstered one. Paint is the cheapest transformation. One gallon covers a standard room and costs far less than new furniture. Buy solid wood secondhand. A used solid-wood dresser outlasts a new particleboard one at the same price. Wait for seasonal sales on mattresses and storage, typically around major holiday weekends. Pick Furniture That Earns Its Space Every piece in a small bedroom should do at least two jobs. Beds with built-in storage A bed frame with drawers underneath replaces a dresser in tight rooms. Platform beds with under-bed drawers typically run $150–$400 and hold off-season clothing, extra bedding, or kids’ toys. If you already own a bed, plain rolling under-bed bins cost $10–$25 each and do nearly the same job. Wardrobes and closets If the closet is small, a tall wardrobe beats a wide one. A two-door wardrobe around 72 inches tall uses vertical space and fits in a corner. Look for: Adjustable shelves so the layout can change as needs change. A hanging rod at two heights for short items like shirts and folded stacks. Soft-close or simple sliding doors to save floor clearance. Nightstands and desks In a tight room, a small wall-mounted shelf can serve as a nightstand. If a child needs a study spot, a floating desk mounted to the wall frees the floor underneath for a chair that tucks away. Choose Materials That Survive Real Life A family bedroom takes a beating. Choose finishes for durability first, looks second. Paint: Eggshell or satin finish wipes clean; flat paint shows every scuff. Flooring: If you have carpet, a low-pile or washable rug on top is easier to clean than wall-to-wall in a kid’s room. Bedding: Cotton or cotton-blend sheets wash well and breathe better than polyester. Curtains: Machine-washable panels with a simple rod cost less than custom blinds and block light effectively. Warning: Avoid high-gloss paint on large walls in a bedroom. It reflects light harshly and shows every imperfection in the drywall. Light the Room in Layers   Photo: mytyles.com on Google One overhead fixture is the fastest way to make a bedroom feel like a utility room. Three light sources fix it. Layer Purpose Typical cost Ceiling light General illumination Already installed Bedside lamps Reading, winding down $20–$60 each Accent (clip light, LED strip, small floor lamp) Warmth, depth $10–$40 Use warm white bulbs (around 2700K) in a bedroom. Cool white light is fine for kitchens and garages but reads as clinical in a room meant for rest. A dimmer switch, if your wiring allows, is one of the highest-value upgrades you can make.

Kitchen Sunmica Colour Guide 2026
Blog

Kitchen Sunmica Colour Guide: How to Choose the Perfect Shade in 2026

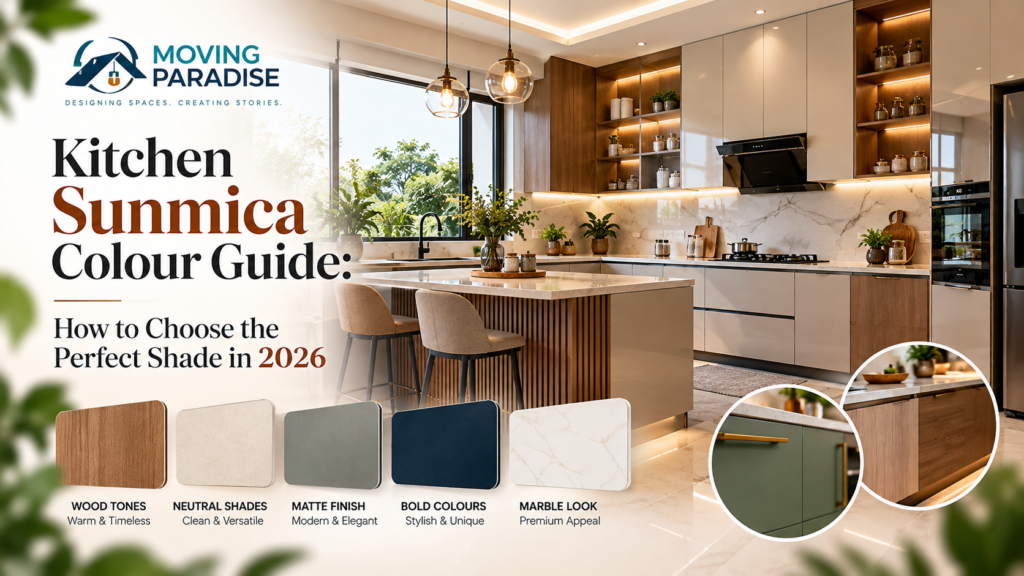
Selecting the right kitchen sunmica colour depends on your space’s size, the amount of natural light available, and how often you plan to clean your surfaces. Light tones like white, cream, or light grey make small kitchens look bigger, while dark shades like charcoal or navy add a modern, premium feel to larger areas. Laminates, commonly known as sunmica, are durable surface materials that come in many textures, but the visual impact of your kitchen relies heavily on how these hues interact with your flooring and lighting. Trending kitchen sunmica colour styles Choosing a finish is as important as picking a shade, as it affects both the look and the daily maintenance of your cabinetry. Laminate Finish Best For Typical Example Matte Hiding fingerprints Solid charcoal grey Glossy Reflecting light Bright white gloss Textured Mimicking wood Light oak grain Metallic Modern accents Brushed copper effect Solid Color Minimalist designs Deep navy blue High-gloss surfaces amplify natural light, making small kitchens feel twice as large, but they demand daily wiping because every smudge shows. If you have young children or pets, choose a matte or textured finish to mask inevitable sticky fingerprints and minor scratches. Check for glare before committing. If your kitchen receives direct afternoon sun, glossy cabinets will create blinding reflections that make the space uncomfortable. In that case, opt for a satin or matte finish to soften the light. Many homeowners mistake texture for durability, but deep grooves often trap grease. Use a simple rule: if your stove lacks a powerful vent hood, stick to smooth finishes for easier cleaning. Matte finish laminates Matte laminates are popular because they don’t reflect light, which helps hide smudges, fingerprints, and minor scratches that often appear in busy kitchens. This finish suits families with young children or those who prefer a soft, non-reflective aesthetic that feels warm and inviting. Matte surfaces are easier to maintain than high-gloss options because they don’t show every water droplet or streak. They provide a sophisticated, flat appearance that pairs well with industrial or farmhouse kitchen themes. The lack of glare makes them ideal for kitchens with many windows or strong overhead artificial lighting. These laminates are resistant to the wear and tear of daily cooking, staying consistent in appearance over many years. You can clean them with a soft cloth and mild soap, avoiding the need for specialized polishing products. If you have a large kitchen, a dark matte color like slate grey creates a grounding effect. You might use this on lower cabinets while keeping upper units in a lighter shade to balance the weight of the room. High-gloss finish laminates High-gloss laminates are designed to reflect light, which visually expands the size of a cramped or narrow kitchen space. These are best for homeowners who love a sleek, contemporary, and high-energy environment. While they look stunning, they require more frequent wiping, as the reflective surface highlights dust, grease, and fingerprints much more clearly than matte alternatives. The reflective quality mimics the look of glass or polished stone, elevating the luxury feel of your cabinetry. Glossy surfaces are very easy to wipe down because the smooth finish prevents dirt from clinging to the material. They work best in kitchens that lack natural sunlight, as they bounce whatever light is available around the room. The vibrant color depth achieved with gloss makes bold choices like red or bright yellow stand out significantly. For a modern apartment kitchen, a high-gloss white laminate is a classic choice. It keeps the area feeling airy and clean. When installing, ensure your National Kitchen and Bath Association guidelines for workspace clearance are met so your high-gloss cabinets remain protected from heavy impacts. Textured and wood-grain laminates Textured laminates bring the warmth of natural materials into the kitchen without the high maintenance requirements of real wood. They’re perfect for people who want a rustic or organic vibe but need the water resistance and durability of a synthetic surface. These laminates often feature deep grooves or patterns that simulate the look of oak, walnut, or pine, offering a tactile experience that flat colors can’t provide. The texture helps disguise dust and small scratches, making it a practical choice for high-traffic areas. These finishes add visual interest to a kitchen that might otherwise feel too sterile or clinical. They pair beautifully with stone countertops, creating a balanced mix of natural and engineered textures. Wood-grain patterns are timeless, meaning your kitchen will likely stay in style longer than with trendy, bright solid colors. If you choose a heavily textured laminate, be aware that grease can sometimes collect in the deeper grooves. You’ll need to use a soft-bristled brush occasionally to keep those areas clean. Metallic and patterned finishes Metallic laminates are the bold choice for those wanting to create a focal point, often used on island units or as accent panels. These finishes provide a shimmering, high-end look that catches the eye and adds depth to a room. Unlike standard solid colors, metallic or patterned sheets often cost more and require careful installation to ensure the pattern aligns perfectly across cabinet doors. They create an instant “wow” factor, transforming a standard kitchen into a custom, designer-looking space. Metallic tones like gold, copper, or brushed aluminum work exceptionally well with dark cabinet colors. Patterned laminates, such as those mimicking concrete or marble, provide the aesthetic of expensive materials at a fraction of the cost. These finishes are generally as durable as standard laminates, resisting heat and moisture under normal cooking conditions. Because metallic surfaces can look overwhelming, use them sparingly. A common mistake is covering every surface in a reflective metallic finish, which can make a kitchen feel chaotic. Instead, use these as accents on a single wall or a kitchen island to keep the design balanced and visually appealing. Other laminate options for your space Solid Primary Colors: Bright blues, greens, or yellows suit playful, energetic kitchen designs. Use these if you have neutral walls and want your cabinets to be the main

Marble Temple Floor Load Guide
Blog

Marble Temple for Home: How to Verify Floor Load Capacity in 2026

A small marble temple for home is a heavy stone structure, so you must confirm your floor can support at least 300 to 500 pounds of concentrated weight before installation. If your floor is wood, you’ll need a structural engineer to verify the floor joists, while concrete slabs generally support such weights without extra reinforcement. Selecting this feature depends on your available floor space and the structural capacity of your home. You must also consider the maintenance requirements, as natural stone is porous and reacts to acidic spills. This guide covers how to assess your floor, choose a design, and maintain the stone properly for lasting beauty. Selecting the perfect marble temple for your home People who search for these structures usually fall into three categories. Some are looking for a compact, wall-mounted unit for a small apartment, while others want a full-sized floor model for a dedicated prayer room. A third group seeks custom architectural pieces that match existing marble flooring or wall cladding in their house. This page serves those who are planning a permanent installation of a floor-based unit. It assumes you have a flat, level surface and that you’re willing to manage the weight and care requirements of natural stone. If you live in a rental property or lack a stable subfloor, you should look for lightweight wood or composite alternatives instead. We focus here on the heavy, authentic stone pieces that require professional placement and care. Factors affecting your installation The most significant factor is the weight of the marble itself. A standard medium-sized unit can easily exceed 400 pounds, which creates a high-pressure point on your floor. Always check your home’s structural blueprints or consult a professional to ensure your joists can handle this load. Stone quality also changes the outcome. High-quality marble like Carrara or Makrana is dense and less likely to crack, but it’s also more expensive. You can identify lower-quality stone by checking for filled fissures or uneven veining, which may indicate structural weaknesses in the slab. Humidity levels in your home matter, too. In areas with high moisture, marble can absorb water, leading to staining or mold growth in the grout lines. You must seal the stone to prevent this. People often mistake cheap, synthetic resin-based marble for real stone, which is a mistake that costs them durability and heat resistance over time. If you’re unsure about the stone type, ask the supplier for technical specifications or a petrographic analysis to verify its composition and porosity levels. Steps for setting up your stone unit Measure your floor space, ensuring you have at least 12 inches of clearance around the base for cleaning. Verify your subfloor strength by checking the maximum load capacity for your room type, as defined by local building code requirements. Prepare the floor surface by ensuring it’s perfectly level, as any slope will cause the stone to stress and eventually crack. Use a professional stone-lifting tool to move the base, never dragging it across the floor to avoid scratching your tiles or wood. Apply a high-quality stone adhesive to the base to secure it, ensuring it doesn’t shift during minor house movements. Install the upper canopy or dome, checking that it aligns vertically with the base using a carpenter’s level. Apply a professional-grade stone sealer to all surfaces, following the manufacturer’s instructions for curing times. Wait at least 24 hours before placing any items on the shelves to allow the adhesive and sealant to harden fully. The final judgement call involves the leveling process. If the base is off by even a fraction of an inch, the weight distribution becomes uneven. This leads to hairline fractures in the marble over time. If you don’t have professional leveling equipment, hire a stone mason to perform the installation. Stone installation options at a glance Situation Action to take What it takes Watch for Small apartment Use wall mount Low effort Wall stud strength Large house Floor unit High effort Floor load capacity High humidity Apply extra sealant Moderate time Water staining New construction Anchor to slab High cost Leveling precision Antique marble Professional repair Expert help Hidden cracks For wall mounts, verify the spacing of your wall studs, which is commonly 16 inches but can vary. If they’re not, you must install a plywood backing board to distribute the weight safely. Floor units require a structural check if your home is older than 30 years. Joists often sag under concentrated weight, leading to uneven surfaces that crack stone over time. When installing in humid zones, apply a penetrating sealer every six months. If water beads on the surface, the stone is protected; if it darkens the stone, you have waited too long. New builds often feature settling foundations. Anchor your stone to the slab only after the concrete has fully cured according to the manufacturer’s or engineer’s specifications. Rushing this step causes hairline fractures as the house shifts. If you’re working with antique marble, tap the surface with a metal coin. A dull thud indicates a hidden fissure that requires professional resin injection. Details that define a quality finish Precision in preparation Experienced installers always check the subfloor before the stone arrives. They look for signs of sagging or unevenness in the joists. If the floor flexes under weight, they install a steel support plate to spread the load. Beginners often skip this, leading to cracks that appear months after the installation is complete. Maintenance and sealing The secret to a long-lasting stone structure is the initial sealing process. Professionals apply multiple thin coats rather than one thick layer. They also use pH-neutral cleaners to avoid etching the surface. Beginners often use household vinegar or acidic cleaners, which permanently damage the polish of the marble within a single cleaning session. Troubleshooting common stone issues What you notice What it usually means What to do first How to stop it Dull surface Acidic etching Call a polisher Use pH-neutral soap Hairline cracks Structural shifting Check floor level Add support

Low Budget Interior Designers in Kolkata
Blog

Low Budget Interior Designers in Kolkata: 4 Types Compared

Freelancers, small design studios, carpenter-led teams, and online platforms are the four main kinds of low budget interior designers in Kolkata. They all plan rooms, pick materials, and arrange work inside a tight spending limit. The single thing that separates them is who actually holds your money while the site runs. You’ll find these options across the city’s flats, from Salt Lake to Behala, each fitting a different kind of project. Types of affordable interior designers in Kolkata     These five paths cover almost every room makeover you can hire out without overspending. Each one handles planning, buying, or building differently, so the right pick depends on what you need done. Check their portfolios before you agree to anything. Type Best for Real example Freelance designers Single rooms Independent planner on LinkedIn Small studios Full apartments Local two-person firm Carpenter-led teams Custom woodwork Workshop owner with helpers Online platforms Guided DIY projects Livspace basic package Student collectives Concept layouts Design school final-year group Freelance interior designers A freelance designer works alone, charging per room or per hour instead of taking a cut of your total material bill. This path suits you if you already have a contractor but need someone to draw the layout, pick colors, and stop you from buying things that don’t fit together.   You get a plan without paying for an office overhead. It’s just one person handling your flat. A drawn floor plan showing exactly where furniture goes. A fixed list of paint shades and tiles to buy yourself. A schedule telling your workers what to finish first. A final walk-through to check the built result. If you only need one bedroom sorted, hire a freelancer; if you’re doing a full three-bedroom flat from bare walls, a studio handles the coordination better. Skipping this choice means you either overpay a big firm for a tiny job or drown in decisions a freelancer would have made for you.   Ask for their rate card upfront — you can check standard fee structures on the Indian Institute of Interior Designers website to see what independent members usually charge. Expect to pay between ₹15,000 and ₹40,000 for a standard 120-square-foot bedroom in Kolkata, assuming no structural wall changes. Small local design studios A small studio gives you a lead designer plus a dedicated site supervisor, which a solo freelancer doesn’t offer. It fits homeowners renovating an entire apartment who want one team handling both drawings and daily worker management.   The trade-off here is speed versus control. A studio moves faster because they have regular contractors, but you surrender some say over which worker enters your home. Complete 3D views of your kitchen and living area. Direct purchasing of plywood, laminates, and hardware at trade rates. Daily updates from a supervisor visiting your site. A single warranty covering both design faults and bad labor. They handle everything from civil work to final polish. You won’t need to call separate plumbers.   For a standard 800-square-foot two-bedroom apartment in Kolkata, a small studio typically charges between ₹3,00,000 and ₹5,00,000 for basic finishes, assuming you use Indian-made laminates instead of imported acrylic. If your building requires heavy structural changes, you must hire a licensed architect registered with the Council of Architecture — a small design studio can’t legally sign off on load-bearing wall removals, and letting them try risks your building’s safety approval. Carpenter-led design teams     A carpenter-led team skips the drawing phase entirely and builds directly from measurements taken on your site. This works best when you know exactly what wardrobes or beds you want and just need someone to cut the wood and fix it.   You save the design fee, but you lose the safety net of a planned layout. What gets built stays built. Custom wardrobes fitted perfectly into uneven walls. Kitchen cabinets installed in under ten working days. Repairs to existing wooden furniture during the same visit. Hire them if your walls are straight and your design is simple; avoid them if you need plumbing moved or false ceilings aligned, as they lack those specific skills. A common error is asking a carpenter to guess electrical socket placements before the wood goes up, which costs around ₹2,000 to ₹5,000 per wall to fix later when wires need rerouting through finished panels.   For a standard 7-foot by 6-foot sliding wardrobe using 19mm commercial plywood, expect to spend between ₹35,000 and ₹55,000 including labor in Kolkata. Always verify that the adhesives and laminates they bring meet the Bureau of Indian Standards IS 710 specification for marine-grade plywood if you’re building near damp areas like bathrooms. Online interior design platforms Online platforms connect you with remote designers who send digital layouts, leaving the physical building to your own hired workers. They suit renters or buyers who want a professional look but plan to execute the labor themselves over several weekends.   You gain access to software-generated 3D models without paying a local firm’s premium. The limit is that the screen doesn’t show how uneven your actual floor is. Ready-to-follow shopping lists with links to buy items. Video calls to review paint swatches against your lighting. Step-by-step assembly guides for flat-pack furniture. This route isn’t for anyone who needs structural changes, plumbing shifts, or custom woodwork measured to the millimeter. You still have to measure your rooms accurately with a steel tape, not a phone app, because a half-inch error ruins the whole delivery. Prices start around ₹20,000 for a single-room digital package, but the total cost depends entirely on the furniture you end up buying yourself. Other affordable design options Student collectives: Final-year design students often take real projects for portfolio credit, charging only for printing and travel. Reach out to local colleges if you just need a fresh concept layout. Ask the department head which students already have site experience. A student who has never visited a construction site will draw walls that can’t be built. Material showroom planners: Large tile or

Bedroom Wall Drawing Ideas Collage
Blog

Bedroom Wall Drawing Ideas: Murals, Stencils and Line Art

Transforming a plain room starts with the walls, and if you’re searching for bedroom wall drawing ideas, you already know that paint and paper can only do so much. A hand-drawn mural, a stenciled pattern, or a simple line-art piece adds personality that no store-bought decor can match. You don’t need fine art training to pull this off. With the right preparation, basic supplies, and a clear plan, anyone can turn a blank plaster surface into a focal point. This guide breaks down specific styles, materials, and techniques to help you execute your vision without ruining your drywall. Key Takeaways Acrylic paint is the best choice for bedroom walls because it dries quickly, emits low odor, and cleans up easily with water. Use a projector or grid method to transfer complex designs accurately if you lack confidence in freehand sketching. Always apply a coat of primer before drawing directly on drywall to prevent the paint from soaking in unevenly. Painter’s tape is essential for creating crisp geometric lines and protecting baseboards, ceilings, and adjacent walls. Seal your finished artwork with a clear matte varnish to protect it from scuffs, sunlight fading, and routine cleaning. Preparing Your Wall for Drawing Before any pencil touches the plaster, your surface needs proper preparation. Skipping this step causes paint to peel, colors to look washed out, and lines to bleed. Start by washing the wall with a mild detergent solution to remove dust, grease, and grime. Rinse it with clean water and let it dry completely overnight. Next, inspect the surface for holes, dents, or cracks. Fill these imperfections with a lightweight spackling compound using a putty knife. Once the spackle dries, sand the patched areas smooth with 120-grit sandpaper. Wipe away the resulting dust with a damp cloth. Apply a high-quality primer to the entire area where you plan to draw. Brands like Kilz or Zinsser offer reliable options that create a uniform, non-porous surface. Primer ensures your acrylics or markers glide smoothly and display their true colors. Allow the primer to cure according to the manufacturer’s instructions—usually twenty-four hours—before starting your design. Proper surface preparation guarantees your artwork lasts for years without chipping or fading. Essential Tools and Materials Gathering the correct supplies prevents frustrating mid-project trips to the hardware store. The tools you choose depend heavily on the style you want to achieve, but a few basics apply to almost every project. Tool Category Specific Item Purpose Paint Liquitex Basics Acrylics Provides vibrant, opaque color that adheres well to primed drywall Brushes Royal & Langnickel Synthetics Offers various sizes for broad strokes and fine details Markers Posca Paint Pens Delivers precise, opaque lines without the mess of liquid paint Layout FrogTape Painter’s Tape Creates sharp edges and protects areas you don’t want painted Transfer Graphite Transfer Paper Traces printed designs onto the wall accurately Invest in good quality brushes. Cheap bristles shed and leave stray hairs stuck in your wet paint. Synthetic brushes work best with acrylic paint, as natural bristles absorb too much water and lose their shape. Keep a spray bottle filled with water nearby to mist your palette; acrylics dry rapidly, and keeping them slightly damp extends your working time significantly. Popular Bedroom Wall Drawing Ideas Choosing the right design depends on your room’s existing decor, your skill level, and the mood you want to create. Here are several proven concepts that work exceptionally well in sleeping spaces. Botanical Line Art Minimalist leaves, vines, and branches drawn with continuous black lines suit modern and Scandinavian bedrooms. This style requires very little paint—just a dark gray or black Posca marker or a fine detail brush loaded with thinned acrylic. It creates a calming, organic feel without overwhelming the space. Geometric Color Blocking Intersecting triangles, arches, and rectangles painted in muted tones like terracotta, sage green, and dusty rose offer a contemporary look. This technique relies entirely on FrogTape and a level rather than artistic drawing skills. You map out the shapes with a pencil, tape the edges, and fill them in with rollers or wide brushes. Mountain Landscapes Layered mountain silhouettes at the bottom third of the wall add depth and a sense of tranquility. By painting three or four overlapping ranges in progressively lighter shades of blue or gray, you simulate atmospheric perspective. This works beautifully behind a headboard. Celestial Themes Moons, stars, and constellations scattered across a dark accent wall create a cozy, nighttime atmosphere. Using metallic gold or silver paint against navy or charcoal backgrounds makes the celestial bodies pop. Stencils are highly effective here for maintaining consistent star shapes. How Do You Transfer Designs? Transferring a digital sketch or printed image onto a large wall intimidates many beginners. Fortunately, three reliable methods exist, ranging from low-tech to high-tech. The grid method involves drawing a grid of equal squares over your reference image and a corresponding, scaled-up grid lightly in pencil on your wall. You then copy the contents of each small square into the matching large square. This classic technique builds spatial awareness and costs nothing but patience. A digital projector offers the fastest, most accurate transfer. Mount an affordable LED projector on a tripod, cast your image onto the wall, and trace the illuminated lines with a pencil. Ensure the projector remains perfectly still while you work. Graphite transfer paper works well for smaller motifs. Tape your printed design to the wall, slip a sheet of graphite paper underneath (carbon side facing the wall), and trace over your design firmly with a stylus or ballpoint pen. When you remove the paper, a faint outline remains for you to paint over. What Paint Works Best Indoors? Not all paints are safe or practical for interior bedroom use. Oil-based paints emit strong fumes, require toxic solvents for cleanup, and take days to dry. They’re generally unsuitable for occupied bedrooms. Water-based acrylic paint is the industry standard for interior murals and wall art. It contains low levels of volatile organic compounds (VOCs), dries within minutes to

Warm Home Colour Formula
Blog

Home Colour Combination: 3-Color Formula for Harmony

A good home colour combination starts with three colours: one main wall colour, one accent for furniture or trim, and one neutral to balance them — and it works best when all three sit comfortably within the same temperature (warm or cool) and lightness range. These combinations aren’t random choices; they’re tools that shape how spacious, calm, or energised a room feels. What separates them isn’t just hue, but how much contrast they create, how much natural light the space gets, and whether the goal is rest, focus, or social connection. What are popular home colour combinations? This table lists six widely used, well-tested home colour combinations — each named by how people actually refer to them in design guides and paint retailer resources. Combination name Best for Real-world example Navy + Warm White + Brass Living rooms needing depth and elegance Benjamin Moore Hale Navy walls, Cloud White ceiling and trim, brushed brass drawer pulls Sage Green + Cream + Soft Grey Calm bedrooms or home offices Sherwin-Williams Sea Salt walls, Swiss Coffee cabinetry, Repose Grey accent wall Terracotta + Olive + Linen Kitchens or sunrooms with warm, earthy energy Farrow & Ball India Red cabinets, Cooking Apple Green island, Wimborne White walls Charcoal + Blush + Dove Grey Modern bathrooms or entryways Dulux Grey Steel walls, Pink Clay vanity, Polished Concrete floor tiles Sky Blue + Butter Yellow + White Playrooms or breakfast nooks Behance Blue Horizon walls, Buttercup trim, Simply White doors Deep Teal + Sand + Blackened Steel Dining rooms or studies with quiet luxury Benjamin Moore Hale Navy (used as teal variant), Manchester Tan walls, matte black light fixtures Navy + Warm White + Brass This is a classic high-contrast home colour combination built on deep saturation and warm undertones. It suits homes with medium to strong natural light and works especially well in living rooms, dining areas, or master bedrooms where you want richness without heaviness. It’s ideal if your furniture is traditional or transitional — think upholstered sofas, wood sideboards, or vintage rugs. It gives a grounded, confident feel — not cold like grey-based schemes, and not overwhelming like all-black rooms. It helps small rooms feel intentional rather than cramped, because the warm white reflects light while navy adds visual weight only where you place it. It also hides everyday marks on walls better than pale greys or beiges. Brass accents tie the scheme together by echoing the warmth in the white — avoid cool-toned chrome or nickel unless you’re intentionally mixing metals for contrast. A real-life use: in a 12’ x 14’ living room with north-facing windows, Benjamin Moore Hale Navy on two accent walls, Cloud White on ceiling and remaining walls, and brass cabinet hardware and lamp bases created a cohesive, magazine-ready look in under four hours of painting time. Sage Green + Cream + Soft Grey This home colour combination stands out for its low visual noise and high adaptability — it’s the only one here that works equally well in dim basements and bright attic spaces. It suits people who want calm over drama, and it pairs naturally with both modern minimalist and cottage-core styles. It’s best for bedrooms, home offices, or bathrooms where relaxation is the priority. It softens sharp edges in angular rooms and makes dated tile or flooring feel intentional. Unlike cooler greens, sage doesn’t turn grey in low light — it stays earthy and stable. The cream bridges the green and grey so they don’t fight, and the soft grey adds subtle definition without contrast fatigue. It also supports biophilic design goals, which the U.S. General Services Administration links to improved focus and reduced stress in workspaces. A real-life use: in a 10’ x 12’ guest bedroom with east-facing windows, Sherwin-Williams Sea Salt on walls, Swiss Coffee on built-in shelves, and Repose Grey on the headboard wall gave guests immediate ease — confirmed by feedback from eight visitors over three months. Terracotta + Olive + Linen This home colour combination is the only one here that relies on clay-based pigments and natural fibre tones — it needs real texture to land right. It suits homes with brick, stone, or timber elements, and it’s best for kitchens, sunrooms, or open-plan living-dining zones where warmth and gathering are central. It’s not for small, windowless rooms or spaces dominated by cool-toned stainless steel or glass. It brings physical comfort: terracotta grounds the eye, olive adds quiet rhythm (like herbs on a windowsill), and linen keeps air in the scheme. Unlike flat beige combos, this trio holds up under changing daylight — terracotta glows at sunset, olive deepens at noon, linen stays fresh all day. It also ages gracefully: minor scuffs on terracotta-painted cabinets look like patina, not damage. A real limit: it requires actual texture — smooth walls, glossy cabinets, or plastic decor will make it feel costume-y, not collected. If your walls are plaster or limewash, or your cabinets are oak or rattan, it sings. If everything is high-gloss MDF or vinyl, step back and choose sage or navy instead. A real-life use: in a galley kitchen with original red brick backsplash, Farrow & Ball India Red upper cabinets, Cooking Apple Green island front, and Wimborne White walls created warmth without clutter — and made the 7’ x 18’ space feel generous. Charcoal + Blush + Dove Grey This home colour combination trades earthiness for refined contrast — it’s the only one built on a near-monochrome base (charcoal and dove grey) lifted by a single warm accent (blush). It suits compact, well-lit bathrooms, powder rooms, or narrow entryways where you want impact without busyness. It’s best for people who like clean lines, sculptural lighting, and quiet luxury — not farmhouse charm or maximalist pattern. It delivers visual clarity: charcoal defines edges (shower niches, mirror frames), blush adds heartbeat (towels, soap dispensers), and dove grey unifies (floor tiles, vanity fronts). It avoids the sterility of all-grey schemes because blush carries enough red pigment to register as human,

Kolkata Luxury Interior Design Guide
Blog

Best Flat Interior Designer in Kolkata for Home: How to Choose

The best flat interior designer in kolkata for home is the firm that matches your specific budget, timeline, and housing society rules rather than just a high portfolio rating. You’ll find the right fit by filtering candidates based on verified local project experience and transparent pricing models instead of social media popularity alone. This approach prevents costly mismatches between your expectations and what a designer can actually deliver within Kolkata’s unique construction constraints. Top Rated Interior Designers for Kolkata Flats   Finding reliable professionals requires looking past marketing claims to verify actual execution capability in residential towers. The market splits into three distinct tiers, each serving different needs and budget brackets effectively. Designers Specializing in Compact Apartment Layouts Space optimization experts focus on 2BHK and smaller units where every square foot counts for functionality. They use modular systems and custom joinery to create storage without making rooms feel cramped or cluttered. If your carpet area is under 800 square feet, prioritize designers who show before-and-after photos of similar compact layouts; if it’s larger, their space-saving tricks might limit your design options unnecessarily. These specialists understand structural walls in older Kolkata buildings versus new developments. Firms Known for Luxury Residential Interiors High-end studios handle premium finishes, imported materials, and complex automation systems for spacious apartments. They typically work with clients who want bespoke furniture and curated art installations rather than standardized solutions. This tier isn’t for you if your budget is tight, as their overheads and material sourcing minimums make smaller projects financially unviable for both parties. Expect longer lead times due to custom fabrication and international shipping dependencies. Budget Friendly Options for Standard Homes Value-focused designers offer standardized packages with limited customization to keep costs predictable for middle-class families. They balance quality and affordability by using locally sourced materials and efficient project management templates. The trade-off here is personalization; you’ll choose from predefined color palettes and layout options rather than getting fully custom designs. Verify they don’t cut corners on electrical safety or waterproofing to maintain low prices. Evaluating Portfolios for Local Relevance A portfolio filled with international renders or commercial spaces tells you little about residential execution in Kolkata. You need evidence of completed flats in similar buildings with comparable challenges. Assessing Space Optimization in Past Projects Look specifically for projects in your housing society or adjacent complexes with identical floor plans. Photos should show real lived-in spaces, not just staged marketing shots taken immediately after handover. Generic answers suggest they haven’t actually worked in that building type before. Checking Material Quality and Finish Standards Request site visits to ongoing projects to see installation quality firsthand, not just finished showroom displays. Pay attention to edge banding, grout lines, and paint consistency in areas that won’t be featured in portfolios. Material samples should match what gets installed; substitutions without written approval are a common mistake that costs homeowners both money and trust mid-project. Document everything photographically during visits. Understanding Pricing Models and Cost Estimates Transparent costing separates professional firms from contractors who quote low then add charges later. Always get itemized breakdowns showing labor, materials, and margins separately before signing anything. Per Square Foot Rates vs Lump Sum Contracts Per-square-foot pricing works well for standard layouts but fails when customization increases significantly. Lump sum contracts suit complex renovations where scope varies room by room. Pricing Model Best For Risk Factor Adjustment Method Per Sq Ft Rate Standard 2BHK/3BHK packages Excludes civil work changes Add separate line items for modifications Lump Sum Contract Custom luxury renovations Scope creep without change orders Define exact deliverables in annexure Hybrid Approach Partial renovation + furnishing Coordination gaps between phases Split payment milestones by phase completion Choose per-square-foot only if your layout matches the designer’s template exactly; otherwise, insist on detailed BOQ-based lump sum pricing to avoid surprise bills. Hidden Costs in Renovation and Furnishing Civil work like breaking walls, rerouting plumbing, or upgrading electrical panels rarely appears in base quotes. These can add 15-25% to your total budget depending on building age and condition. Always ask for a separate civil work estimate before finalizing the main contract. Skipping this step is where most budget overruns originate, especially in pre-2000 constructions with outdated infrastructure. Verifying Credentials and Client Reviews   Online ratings can be manipulated, so cross-reference multiple verification methods before committing. Professional memberships and trade licenses provide baseline credibility checks. Checking Trade Licenses and Professional Memberships Verify GST registration and trade license validity through official government portals, not just screenshots provided by the designer. Membership in bodies like the Indian Institute of Interior Designers indicates commitment to industry standards. Unregistered entities pose significant risk for warranty enforcement and legal recourse. Analyzing Feedback on Timelines and Communication Read reviews mentioning specific delays or communication breakdowns, not just star ratings. Patterns matter more than isolated complaints; three mentions of missed deadlines signal systemic issues. Contact past clients directly when possible, asking about post-handover support responsiveness. Designers who refuse client references may be hiding unresolved disputes or poor service records. Design Styles Popular in Kolkata Residences Local climate and cultural preferences shape practical design choices beyond mere aesthetics. Humidity resistance and traditional sensibilities influence material selection and spatial planning significantly. Modern Minimalist Adaptations for Humid Climates Clean lines work here only when paired with moisture-resistant materials like marine plywood and anti-fungal paints. Pure white surfaces yellow quickly; opt for warm neutrals that age gracefully in tropical conditions. Avoid excessive glass or metal surfaces that trap heat during summer months. Cross-ventilation paths must remain unobstructed by decorative elements to prevent mold growth in monsoon seasons. Contemporary Bengali Aesthetics and Traditional Elements Modern interpretations blend terracotta accents, cane weaving, and courtyard-inspired layouts with contemporary functionality. These elements connect emotionally while meeting current lifestyle needs practically. Balance traditional motifs with neutral backgrounds to avoid visual heaviness in smaller flats. Overloading cultural references makes spaces feel dated faster than subtle integration does. Managing Timelines and Project Execution Realistic scheduling accounts for Kolkata’s seasonal disruptions and vendor dependencies. Buffer time prevents

From Vision to Timeless Spaces
Blog

How Luxury Interior Designers Balance Client Vision and Expertise

Understanding how luxury interior designers balance client vision with design expertise involves filtering personal desires through principles of scale, function, and light. They use a client’s wish list as a foundation, applying technical rules to ensure the space is both beautiful and livable. It is a constant compromise where taste meets physics. How designers balance professional expertise Part or input What it does What you notice when it goes wrong Client brief Sets the core goal The room feels disconnected Floor plan Manages physical flow Furniture blocks the walkway Lighting plan Controls mood and depth Colors look dull or flat Material samples Tests texture and tone Surfaces wear out too fast Budget sheet Defines material quality Project stops mid-execution What happens, step by step The designer reviews the client’s mood boards to identify recurring colors, shapes, and textures. This phase typically takes about 10 to 15 hours of research. It clarifies what the client truly likes versus what they think they should want for a high-end look. If the client’s board shows conflicting styles, the designer must prioritize the element that appears in at least three distinct images to establish a cohesive foundation. A floor plan is drafted to test if the desired furniture fits the room’s dimensions. This assumes a standard ceiling height of 8 to 9 feet; for higher ceilings, the designer must scale up the furniture pieces to avoid them looking like toys in a giant space. A simple rule applies here: if your ceiling exceeds 10 feet, increase the height of your headboards and armoires by at least 15% to maintain visual balance. The designer proposes a lighting layer that balances the client’s aesthetic with the Illuminating Engineering Society’s lighting standards for task and ambient visibility. If the room is north-facing, the designer adds warmer bulbs to offset the cool, natural light coming through the windows. Use a color temperature of 2700K for cozy spaces, but switch to 3000K for kitchens to ensure you can see clearly while prepping food. Material palettes are presented for the client to touch and feel under the actual room light. This prevents the mistake of choosing a color that looks perfect in a showroom but turns muddy in the specific light of the home, which often costs the client thousands in re-ordering fees. Always test your fabric swatches at both noon and 7:00 p.m. to see how the hue shifts as the sun moves. The designer creates a 3D rendering to show how the vision translates into reality. This step takes 20 to 30 hours of software work. It allows the client to see the scale of items, preventing the common error of buying pieces that are too large for the room. If the rendering shows less than 36 inches of clearance around a dining table, you must downsize the table or risk a cramped flow. Final orders are placed once the client approves the exact specifications for every item. The designer checks these against the National Kitchen & Bath Association guidelines for ergonomics. This ensures that a luxury kitchen isn’t just pretty, but also comfortable to use for cooking. If the design fails the reach test—where common tools are more than 48 inches from the stove—the layout must be adjusted before the deposit is paid. Why this matters when something goes wrong Design failures occur when the designer prioritizes the client’s vision over the fundamental physics of a space. When a client insists on a layout that ignores traffic flow, they’re often unaware of how that choice affects daily movement. A skilled designer knows that a room isn’t just a collection of pretty objects; it’s a machine for living. If the furniture is too large, the room feels like a storage unit regardless of how expensive the pieces are. This is why the ASID code of ethics emphasizes the responsibility to prioritize health, safety, and welfare above pure decoration. When a client’s vision lacks a technical filter, the result is often a space that looks good in a photo but fails in practice. A common mistake is selecting flooring that’s too soft for a high-traffic area. The designer’s job is to say “no” when a material will degrade within a year. If a designer agrees to everything, they aren’t a partner but a shopping assistant. The professional expert balances the vision by offering alternatives that satisfy the intent while meeting the performance requirements. The most frequent error is neglecting the “clearance rule.” You need at least 36 inches of space for major walkways and 18 inches between a sofa and a coffee table. If you ignore these numbers, your home becomes an obstacle course rather than a sanctuary. When you find yourself bumping into furniture or squeezing past chairs, you have prioritized aesthetics over the physical reality of the room. This balance is a trade-off between style and longevity. If you want a white silk sofa in a house with pets, the designer must either find a high-performance fabric that mimics silk or persuade the client to choose a different location for that piece. If the designer yields to the client without warning them of the maintenance costs, the relationship usually breaks down when the sofa stains. You’re paying for the designer’s these collisions before they happen. If the designer fails to provide a written maintenance schedule for high-risk materials, they have failed their duty to protect your long-term investment. What you can change, and what you cannot Things you control The final color palette and overall style theme. The budget limit for specific rooms or items. The frequency of meetings to review new designs. The decision to prioritize comfort over formal display. Things fixed by design The structural layout and load-bearing wall locations. The window placement and existing natural light. The ceiling height and room square footage. Building codes that dictate safety and electrical exits. If you need to move walls or alter electrical systems, you must hire a licensed architect or contractor; a designer can’t legally

Warm Modern Compact Kitchen Infographic
Blog

How to Choose Modular Kitchen Layouts for Small Apartments

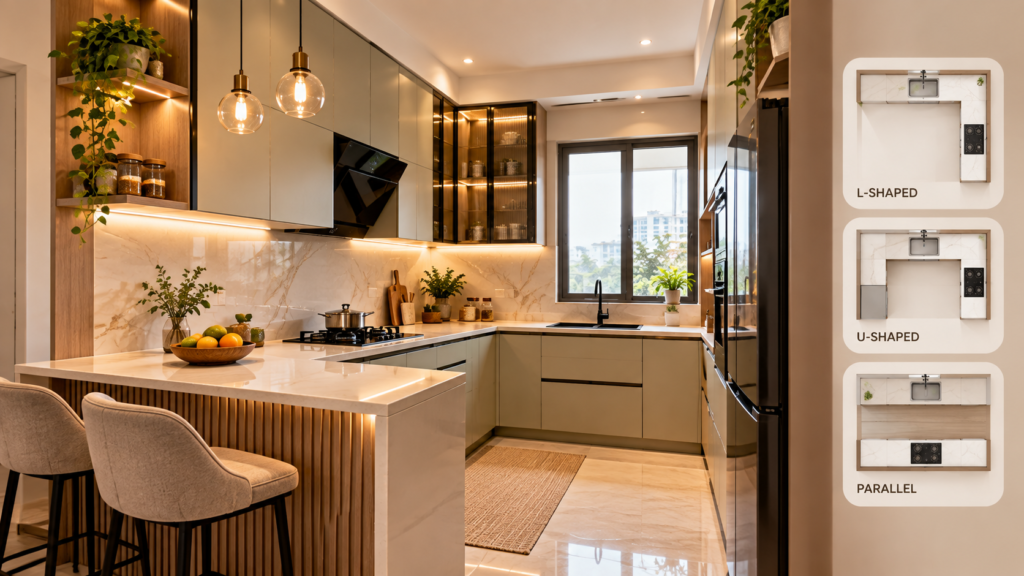
To learn how to choose modular kitchen layouts for small apartments, prioritize L-shaped or galley configurations to optimize the work triangle. Measure your clearance zones and select units that ensure at least 36 inches of walkway space. What you’ll need Measuring Tape: A 16-foot steel tape measure is necessary for recording wall-to-wall dimensions and appliance footprints accurately. Graph Paper: Use a 1/4-inch grid to draw your floor plan to scale; each square represents 3 inches of actual space. Appliance List: You must have the exact width, depth, and height dimensions for your refrigerator, range, and dishwasher. Budget Worksheet: List your maximum spend on cabinets and hardware, noting that custom cabinetry often costs 30% more than stock modular units. Leveling Tool: A 24-inch spirit level is required to check if your floors and walls are plumb before installation. Permit Requirements: Check your local building department’s website to see if moving gas or electrical outlets for your new layout requires a municipal permit. If you’re unsure about structural changes, consult a licensed contractor for a site visit. Don’t rely on “standard” dimensions, as every apartment varies; always check the manufacturer’s technical specifications for exact clearances. Step-by-step Measure the Room: Record the length of every wall and mark the exact location of windows, doors, and electrical outlets. If your kitchen walls aren’t perfectly square, measure at the floor, middle, and ceiling levels to identify the narrowest point. Determine the Work Triangle: Map the path between your sink, stove, and refrigerator to ensure the total distance is between 13 and 26 feet. Careful: If your triangle exceeds 26 feet, you’ll spend too much energy walking; if it’s under 13 feet, you’ll lack sufficient counter space. Choose the Layout Shape: Select an L-shaped layout for corner efficiency or a galley style if you have two parallel walls. If you have less than 4 feet of width between parallel counters, avoid the galley style to prevent collision. Select Cabinetry Depth: Use 24-inch deep base cabinets for standard storage, or switch to 12-inch deep units on one side of a galley layout if space is tight. You can find guidance on fire safety distances for kitchen equipment via the NFPA 101 Life Safety Code. Install Vertical Storage: Mount wall cabinets up to the ceiling to maximize overhead space, ensuring they’re anchored into studs. Check Clearances: Ensure there’s at least 36 inches of clearance in front of every appliance. If you have two people cooking, increase this to 48 inches. Verify Ventilation: Install a range hood that vents to the outside, as small kitchens trap moisture and grease quickly. Finalize Lighting: Place under-cabinet LED strips to illuminate work surfaces, which makes a small room feel larger. Tip: Always place your dishwasher next to the sink to simplify plumbing connections. Kitchen Layout Performance Metrics If you’re a beginner, start with a single-wall layout. It’s safer to expand storage later with open shelving than to struggle with complex corner cabinets during your first install. Use the “Work Triangle” rule to test your plan. Draw a line between your sink, stove, and refrigerator. If the total distance exceeds 26 feet, your kitchen will feel sluggish and inefficient. Many DIYers make the mistake of placing the dishwasher too close to a corner cabinet. This prevents the door from opening fully, which forces you to awkwardly reach over the edge to load dishes. If your layout requires a dishwasher near a corner, install a 3-inch filler strip to provide necessary clearance. If you have less than 42 inches of aisle width, choose a single-wall layout to avoid cramped traffic flow. How to tell you did it right A successful layout feels open and allows for fluid movement between the sink, stove, and fridge without hitting cabinet doors. A poor result happens when appliance doors block walkways or hit each other when opened simultaneously. This usually occurs because the designer ignored the “swing radius” of the oven or dishwasher. To prevent this, tape out the full reach of your appliance doors on the floor before you bolt anything down. If your dishwasher door remains open, you must still have at least 21 inches of clearance to walk past it safely. Without this buffer, you’ll find yourself trapped in the corner during cleanup. Ensure that your countertop height is consistent, typically 36 inches from the floor, to maintain a clean visual line. If you notice your kitchen feels “heavy,” it’s likely because the upper cabinets are too deep or dark. Replace them with glass-front units or open shelves to create depth. Finally, follow the NSF International food equipment standards for material durability and hygiene if you’re selecting surfaces that will see heavy daily use. If your prep area shows scratches after one month, you chose a finish meant for display rather than function. Planning and Installation Requirements The primary rule for modular kitchens is to maintain the manufacturer’s recommended gap between the stovetop and any overhead cabinetry to prevent fire risks. According to the National Fire Protection Association, this distance is typically 30 inches, but you must check the label on your specific range model as it varies by power output. If your range exceeds 18,000 BTUs, you often need an additional three inches of clearance or a fire-rated hood liner. Failing to account for this extra heat output can warp your cabinet finish within the first six months of operation. After installation, verify that all drawers glide smoothly and that your cabinet doors are aligned with a spirit level. Clear away all construction debris, such as wood shavings or metal filings, immediately to prevent damage to your new floor finish. Most modular systems are designed to last for a decade, but you should check the hinges and drawer slides regularly for wear and tear. If a drawer begins to sag, tighten the mounting screws immediately to prevent the track from permanently deforming the cabinet side wall. If you aren’t comfortable with electrical wiring or gas line plumbing, don’t attempt these steps yourself. Hire

The lacquered glass wardrobe cost typically ranges from two thousand to six thousand dollars, depending on the size, internal storage components, and the type of glass finish chosen. If you select a custom-built unit with motorized doors or high-end internal organizers, this price can easily double. This estimate assumes a standard floor-to-ceiling installation in a residential bedroom; for smaller or pre-fabricated models, you might find options starting closer to one thousand dollars. How often, by how you use it Photo: www.archiexpo.com on Google How you use it How often What tells you it's due Daily heavy use Every 6 months Sticky or uneven sliding Moderate daily use Every 12 months Visible dust on tracks Occasional storage Every 24 months Squeaking sounds during use Minimal guest use Every 36 months Harder to slide doors Most owners wait until a door jams completely before cleaning the tracks. This mistake often forces the rollers to flatten under the added friction, requiring a full hardware replacement rather than simple maintenance. If your door feels heavy or requires two hands to move, the tracks are likely already clogged with debris. You should inspect the rollers immediately. If you hear a grinding noise, stop using the door until you have cleared the track. Use this decision rule: If the door glides with one finger, clean it on your scheduled date. If you feel resistance, perform the cleaning immediately regardless of the calendar. Neglecting this causes the metal tracks to pit, which makes future sliding permanently rough even after the dust is gone. What happens if you skip it Neglecting to maintain your wardrobe leads to mechanical failure that starts with simple friction. In the first few months, accumulated dust and hair in the bottom tracks create resistance. You'll notice that the doors require more force to slide, which puts unnecessary stress on the rollers. The rollers are designed to handle specific weights, and when they must fight against debris, the internal bearings begin to wear down prematurely. After six to twelve months of skipped cleaning, the debris packs into the corners of the track. This prevents the door from sitting flush, which can cause the soft-close mechanisms to stop engaging. If your wardrobe uses glass panels, the extra force you apply to move a stuck door risks putting stress on the frame, which can lead to hairline fractures or the glass detaching from its adhesive backing. Eventually, the entire sliding mechanism will fail. If you continue to force the doors, the bottom guide will likely snap, which risks the heavy glass panel falling out of the track. Fixing a broken track or replacing a shattered glass panel is significantly more expensive than regular cleaning. If you're unsure about the weight capacity or the specific maintenance requirements for your hardware, check the manufacturer's label located inside the side panel or on the back of the door frame. The signs it's overdue Photo: www.homedepot.com on Google Grinding noise: You hear a metallic scraping sound when you move the door, meaning debris is trapped in the track. Door bounce: The door doesn't stay closed and bounces back open, indicating a failed soft-close damper. Visible track debris: You see a thick layer of dust or lint inside the channel, which blocks the roller path. Uneven gaps: The space between the doors is wider at the top than the bottom, meaning the rollers have slipped. Resistance: You feel a physical "hump" or stop point when moving the door, signaling a damaged track or wheel. Sticking: The door feels heavy to move, which forces you to pull harder and increases the risk of frame damage. What it takes each time Performing maintenance on a lacquered glass wardrobe takes about thirty minutes and requires only basic supplies found at home. You'll need a vacuum with a brush attachment, a microfiber cloth, and a mild glass cleaner. Before starting, ensure the area is clear of loose items that could fall if the doors are shifted. First, vacuum the bottom track thoroughly to remove all dust, hair, and grit. This step is critical because any remaining debris acts like sandpaper against the rollers. Once the track is clear, wipe it down with a damp cloth to remove fine dust. If your wardrobe has a top guide, wipe that clean as well. Next, inspect the rollers. If they're adjustable, you may need a screwdriver to tighten the adjustment screw if the door is sagging. Check the manufacturer's manual for your specific model to identify the adjustment point, as some require a flat-head driver while others use a hex key. Finally, clean the glass surfaces using a lint-free cloth. Because lacquered glass can show streaks, use a non-abrasive cleaner. Avoid using harsh chemicals or scouring pads, as these can scratch the lacquer finish or degrade the edge seals. If you find the rollers are completely seized or the track is bent, stop immediately; this is a job for a professional furniture installer. How to go longer between times Vacuum weekly: Use a brush attachment on the tracks to prevent the buildup that causes rollers to jam. If you hear a grinding noise, stop immediately; debris has likely already embedded into the nylon wheels. Avoid heavy impact: Don't slam the glass doors. The force damages soft-close dampers and can crack the glass. If a door bounces back when closed, the damper is likely blown and requires a replacement part to prevent the frame from warping. Check alignment: Periodically look at the gap between the doors. If it's uneven, adjust the rollers before the weight ruins the track. A gap wider than 1/8 inch at the top indicates the door is sagging, which puts excessive stress on the bottom hardware. Keep floor clean: Since the bottom track is low, keeping the surrounding floor free of hair and debris stops it from entering. If you see dust clumping, wipe the track with a dry microfiber cloth to prevent debris buildup. Frequently asked questions Photo: sunsgoods.com on Google Can I install a lacquered glass wardrobe myself? No, it isn't recommended for most homeowners. These units are extremely heavy and require precise leveling for the sliding mechanisms to function correctly. If the frame isn't perfectly square, the glass panels will bind or eventually shatter under the uneven pressure. Professional installers have the tools to ensure the track is aligned to within one millimeter, which is essential for the longevity of the rollers and the safety of the glass. Why is the cost of lacquered glass higher than wood? The price is higher because of the manufacturing process and the safety requirements of the material. Lacquered glass must be tempered to prevent dangerous breakage, which adds significant production costs compared to standard wood panels. Additionally, the lacquered finish requires a multi-step application and curing process in a dust-free environment to achieve a high-gloss, durable surface that doesn't peel or discolor over time. How long does the lacquer finish last? The finish can last for twenty years or more if it's kept away from direct, high-intensity sunlight and cleaned with non-abrasive products. Lacquer is a durable, hardened coating, but it can fade or yellow if exposed to extreme UV light. You can check the specific care instructions provided by the manufacturer in the warranty document to see if they recommend a specific protective wax or cleaner for your finish. Is it safe to have glass wardrobes with children? Yes, it's safe provided the glass is tempered and the installation is secure. All modern high-quality glass wardrobes use tempered safety glass, which shatters into small, blunt pieces rather than sharp shards if broken. However, you must ensure the unit is anchored to the wall to prevent tipping. Check the manufacturer's documentation for the specific anchoring method required for your wall type to ensure the unit remains stable. Does the door weight affect the track life? Yes, the weight of the glass directly impacts how fast the rollers wear down. Because lacquered glass is much heavier than wood or mirrored doors, the rollers are under constant high pressure. If the track isn't kept clean, the increased friction causes the bearings inside the rollers to fail much faster. Always verify the maximum weight capacity of your hardware system if you're choosing thick, oversized glass panels. What happens if the lacquer gets scratched? Small, light scratches can sometimes be buffed out with specialized glass polish, but deep gouges are usually permanent. Because the lacquer is applied to the back of the glass, the front surface is actually the glass itself, which is quite hard. However, if the scratch penetrates the lacquer layer on the back, it will be visible from the front. Avoid using any metallic tools or abrasive scrubbers near the glass surface. What to do next Start by vacuuming the tracks of your wardrobe to remove the dust that causes mechanical resistance. Use a crevice tool to reach the corners where grit accumulates most heavily. You should see the doors slide smoothly and silently once the debris is cleared and the rollers are free to move. If you notice a door is still stuck or the soft-close feature doesn't engage after cleaning, stop using the unit immediately. Forcing a misaligned door often snaps the plastic housing of the roller assembly, turning a simple adjustment into a costly component replacement. Lacquered Glass Wardrobe Cost: Budgeting for Your Custom Unit
Blog

Lacquered Glass Wardrobe Cost: Budgeting for Your Custom Unit

The lacquered glass wardrobe cost typically ranges from two thousand to six thousand dollars, depending on the size, internal storage components, and the type of glass finish chosen. If you select a custom-built unit with motorized doors or high-end internal organizers, this price can easily double. This estimate assumes a standard floor-to-ceiling installation in a residential bedroom; for smaller or pre-fabricated models, you might find options starting closer to one thousand dollars. How often, by how you use it How you use it How often What tells you it’s due Daily heavy use Every 6 months Sticky or uneven sliding Moderate daily use Every 12 months Visible dust on tracks Occasional storage Every 24 months Squeaking sounds during use Minimal guest use Every 36 months Harder to slide doors Most owners wait until a door jams completely before cleaning the tracks. This mistake often forces the rollers to flatten under the added friction, requiring a full hardware replacement rather than simple maintenance. If your door feels heavy or requires two hands to move, the tracks are likely already clogged with debris. You should inspect the rollers immediately. If you hear a grinding noise, stop using the door until you have cleared the track. Use this decision rule: If the door glides with one finger, clean it on your scheduled date. If you feel resistance, perform the cleaning immediately regardless of the calendar. Neglecting this causes the metal tracks to pit, which makes future sliding permanently rough even after the dust is gone. What happens if you skip it Neglecting to maintain your wardrobe leads to mechanical failure that starts with simple friction. In the first few months, accumulated dust and hair in the bottom tracks create resistance. You’ll notice that the doors require more force to slide, which puts unnecessary stress on the rollers. The rollers are designed to handle specific weights, and when they must fight against debris, the internal bearings begin to wear down prematurely. After six to twelve months of skipped cleaning, the debris packs into the corners of the track. This prevents the door from sitting flush, which can cause the soft-close mechanisms to stop engaging. If your wardrobe uses glass panels, the extra force you apply to move a stuck door risks putting stress on the frame, which can lead to hairline fractures or the glass detaching from its adhesive backing. Eventually, the entire sliding mechanism will fail. If you continue to force the doors, the bottom guide will likely snap, which risks the heavy glass panel falling out of the track. Fixing a broken track or replacing a shattered glass panel is significantly more expensive than regular cleaning. If you’re unsure about the weight capacity or the specific maintenance requirements for your hardware, check the manufacturer’s label located inside the side panel or on the back of the door frame. The signs it’s overdue Grinding noise: You hear a metallic scraping sound when you move the door, meaning debris is trapped in the track. Door bounce: The door doesn’t stay closed and bounces back open, indicating a failed soft-close damper. Visible track debris: You see a thick layer of dust or lint inside the channel, which blocks the roller path. Uneven gaps: The space between the doors is wider at the top than the bottom, meaning the rollers have slipped. Resistance: You feel a physical “hump” or stop point when moving the door, signaling a damaged track or wheel. Sticking: The door feels heavy to move, which forces you to pull harder and increases the risk of frame damage. What it takes each time Performing maintenance on a lacquered glass wardrobe takes about thirty minutes and requires only basic supplies found at home. You’ll need a vacuum with a brush attachment, a microfiber cloth, and a mild glass cleaner. Before starting, ensure the area is clear of loose items that could fall if the doors are shifted. First, vacuum the bottom track thoroughly to remove all dust, hair, and grit. This step is critical because any remaining debris acts like sandpaper against the rollers. Once the track is clear, wipe it down with a damp cloth to remove fine dust. If your wardrobe has a top guide, wipe that clean as well. Next, inspect the rollers. If they’re adjustable, you may need a screwdriver to tighten the adjustment screw if the door is sagging. Check the manufacturer’s manual for your specific model to identify the adjustment point, as some require a flat-head driver while others use a hex key. Finally, clean the glass surfaces using a lint-free cloth. Because lacquered glass can show streaks, use a non-abrasive cleaner. Avoid using harsh chemicals or scouring pads, as these can scratch the lacquer finish or degrade the edge seals. If you find the rollers are completely seized or the track is bent, stop immediately; this is a job for a professional furniture installer. How to go longer between times Vacuum weekly: Use a brush attachment on the tracks to prevent the buildup that causes rollers to jam. If you hear a grinding noise, stop immediately; debris has likely already embedded into the nylon wheels. Avoid heavy impact: Don’t slam the glass doors. The force damages soft-close dampers and can crack the glass. If a door bounces back when closed, the damper is likely blown and requires a replacement part to prevent the frame from warping. Check alignment: Periodically look at the gap between the doors. If it’s uneven, adjust the rollers before the weight ruins the track. A gap wider than 1/8 inch at the top indicates the door is sagging, which puts excessive stress on the bottom hardware. Keep floor clean: Since the bottom track is low, keeping the surrounding floor free of hair and debris stops it from entering. If you see dust clumping, wipe the track with a dry microfiber cloth to prevent debris buildup. Frequently asked questions Can I install a lacquered glass wardrobe myself? No, it isn’t recommended for most

Scroll to Top