
Wall Panelling Designs for Living Room: 8 Ideas for Kolkata Homes
8 wall panelling designs for living room walls in Kolkata flats: fluted WPC, louvers, PVC marble and more, with approximate costs and humidity tips.


8 wall panelling designs for living room walls in Kolkata flats: fluted WPC, louvers, PVC marble and more, with approximate costs and humidity tips.
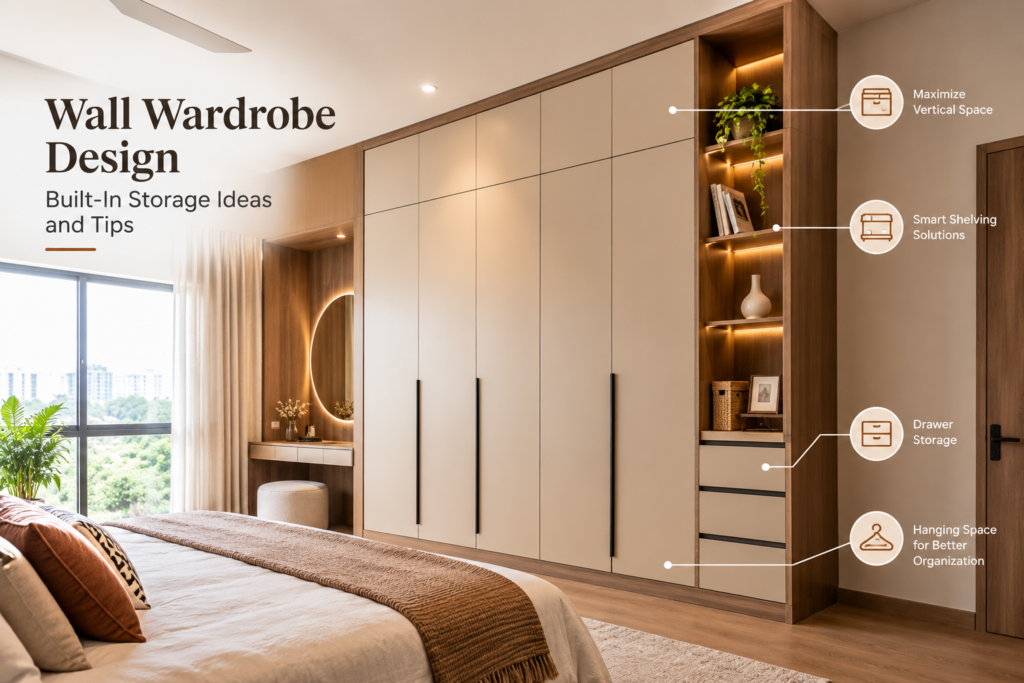
A wall wardrobe design uses the full height and width of a room’s wall to build storage, typically running 84 to 96 inches tall in homes with standard 8-foot ceilings. It replaces freestanding closets with built-in shelving, hanging rods, and drawers that sit flush against the structure. This guide covers the framing, materials, layout choices, and load limits you’ll need to plan one yourself. What a built-in closet actually is A built-in closet is a storage system anchored directly to a room’s walls and floor. It doesn’t move like a standalone piece of furniture. You use it to store clothes, shoes, and bedding without taking up extra floor space. It works well in bedrooms where square footage is tight. People often think these units are just large cabinets pushed against a wall. They aren’t. A true built-in relies on the wall studs for support. The frame attaches to those studs so it can hold heavy loads safely over time. If it isn’t fastened to the structure behind the drywall, the weight of hanging clothes will pull it down. The main misconception is that any flat wall works equally well, but walls with plumbing or electrical wiring inside them change everything. Hitting a pipe or wire costs thousands in repairs. That’s why checking the wall cavity comes first. This approach fits anyone who needs permanent storage. Renters usually can’t use it because it alters the property. Homeowners get the most out of it. How to frame a wall wardrobe You start by measuring your space and cutting the frame pieces to fit. These steps assume standard 2×4 lumber for the frame and 3/4-inch plywood for the shelves in a typical 8-foot-tall alcove. For taller ceilings, add proportional length to the vertical supports. Measure the wall’s width and height at three points each. Use the smallest measurement so the frame fits without forcing it. Mark the stud locations along the wall using a stud finder. Studs are usually 16 inches apart from center to center. Cut two vertical side panels from 3/4-inch plywood to match your lowest height measurement. Attach a horizontal cleat (a strip of wood) to the wall studs at the top and bottom of your marked area. Use 3-inch wood screws driven into the studs, not just the drywall. Stand the side panels against the cleats and screw them into the wall studs every 16 inches. Install horizontal shelf supports between the side panels. Space them 12 inches apart for folded clothes or 40 inches apart for hanging rods. Add the back panel using 1/4-inch plywood nailed to the frame edges to keep the structure square. Hang doors or install drawer fronts last, once the internal frame is fully level. The single judgment call here is depth. If you go deeper than 24 inches, you’ll struggle to reach items at the back. Keep it at 24 inches for hanging clothes; if you only need shelves for shoes, 14 inches saves floor space. Cutting structural wall studs requires a building permit in most areas, so leave that work to a licensed contractor. Wall wardrobe measurements and settings These numbers give you the exact spacing needed to build a functional unit. Every measurement below assumes you’re working with standard adult clothing and an 8-foot ceiling height. Adjust proportionally if your ceiling is higher or lower. Situation What to use How long What to watch for Hanging long coats Single rod 65 inches from floor Rod sags if span exceeds 36 inches without a center bracket Hanging shirts Double rods 40 inches between rods Lower clothes drag if gap is under 38 inches Folded sweaters Solid shelf 12 to 15 inches wide per stack Stacks wider than 15 inches fall over easily Shoe storage Angled shelf 14 inches deep Flat shelves need 16 inches to fit larger boots Top storage bins High shelf 80 inches from floor Anything higher requires a step stool to reach safely Drawer clearance Bottom space 6 inches above floor Less clearance catches on thick carpets when opening If your ceiling is 9 feet instead of 8, add 12 inches to the top shelf height. Don’t stretch the middle sections, or your hanging clothes won’t align properly. Always measure twice before cutting the plywood, as custom cuts can’t be returned to the lumber yard. Getting the layout right The difference between a unit that works and one that fails comes down to the order you build it. Start from the floor up. If the base isn’t perfectly level, every shelf above it will tilt slightly forward. Doors won’t close right, and drawers will slide open on their own. Use a 4-foot spirit level on the bottom cleat before you attach anything else. Shims—thin wedges of wood—go under the base where the floor dips. Don’t skip this part. A fraction of an inch off at the bottom becomes half an inch of lean at the top. Experienced builders check the square shape after adding each horizontal shelf. They measure diagonally from corner to corner. If both diagonal measurements match exactly, the box is square. If they don’t, adjust the frame before driving the final screws. Leaving it out of square means your doors will never hang straight, no matter how much you adjust the hinges later. Leave the back panel off until the frame is completely square. Nailing it on too early locks in any mistakes you’ve made. Once the frame is set, the back panel acts as a brace that stops the whole unit from swaying side to side. Choosing the right material Plywood holds screws better than particleboard. Particleboard swells and crumbles if water touches it, which happens easily near exterior walls where condensation forms. If your budget forces you to use particleboard, seal all edges with edge banding before assembly. Unsealed edges absorb moisture from the air over time. For shelves holding heavy winter coats, use 3/4-inch plywood. Thinner boards bow under weight. The APA – The Engineered Wood Association publishes span tables showing

A successful office ceiling design improves light distribution and sound control by selecting materials that match your specific acoustic and lighting needs. You should expect professional installation to be an affordable option relative to other ceiling types, depending on the complexity of the grid and the acoustic rating of the tiles you choose. Different spaces require different technical approaches. Open-plan offices need high noise reduction, while private meeting rooms may prioritize aesthetics or moisture resistance. Your final choice depends on your building’s height, the existing HVAC ductwork, and your local fire safety regulations. Designing the perfect office ceiling Many businesses need a ceiling that hides messy wires while keeping the room quiet. If you’re a startup owner, you might want an exposed look to save money and add height. If you run a law firm or a medical office, you likely need a drop ceiling to hide pipes and reduce noise between rooms. This guide assumes you’re working with a standard commercial space with a flat floor. If you have an industrial-style loft or a sloped roof, your costs will increase because you’ll need custom mounting brackets. We focus here on the suspended grid system, as it remains the most common choice for modern office layouts. Factors that change the outcome The most important factor is the Noise Reduction Coefficient (NRC) of your tiles. If your office is full of hard surfaces like glass and concrete, you need tiles with an NRC of 0.70 or higher to stop echoes. You can find these ratings on the technical data sheets provided by the ceiling tile manufacturer. Ceiling height is the second factor. A standard drop ceiling usually needs at least 6 inches of clearance below the lowest duct or pipe. If your ceiling is already low, you might lose too much vertical space. Check your local building codes to ensure you maintain the minimum required clearance for your specific occupancy type. Lighting integration also matters. If you plan to use recessed LED panels, you must ensure the grid layout aligns with the tile sizes. People often make the mistake of choosing tiles first and lights second, which leads to expensive, custom-cut tiles that look messy. Always plan the grid and light placement together before buying any materials. Installing a suspended grid system Measure the room perimeter and mark the level line for the wall molding at least 4 inches below the lowest obstruction. Install the L-shaped wall molding around the entire room, securing it to studs or masonry every 16 inches. Snap chalk lines on the main ceiling to mark where the main runners will hang. Install wire eyelets into the structural ceiling and hang the main runners using 12-gauge galvanized steel wire. Level the runners by twisting the wires until the grid sits perfectly flat and level. Insert the cross tees into the main runners to create the 2×2 or 2×4 foot grid pattern. Place the acoustic ceiling tiles into the grid, starting from the center of the room and working toward the walls. Cut the perimeter tiles to fit the gap between the last full tile and the wall molding. The final judgement call involves how you trim the edge tiles. A professional finish requires using a sharp utility knife to create a clean, square edge that sits flush against the wall molding. If you leave large gaps, you create a visual distraction that makes the entire installation look unfinished. Ceiling types and their uses Ceiling Type Best Use Case Typical Cost What to Watch For Mineral Fiber Standard offices Low Moisture damage Metal Panels High-traffic halls High Fingerprints, dents Fiberglass Quiet meeting rooms Medium Edge durability Wood Veneer Executive suites Very high Fire code ratings Open Plenum Creative studios Lowest Dust on ducts Mineral fiber tiles absorb sound well but sag if humidity exceeds 70 percent. Use them only in climate-controlled zones. Metal panels offer unmatched longevity in corridors. However, they reflect noise, so install acoustic backing if the hallway serves as a primary workspace. Fiberglass provides superior thermal insulation. Avoid using these tiles in areas with frequent maintenance access because the edges crumble under light handling. Wood veneer adds prestige but requires a Class A fire rating in most commercial buildings. Check local codes before purchase to avoid expensive retrofits. Open plenum designs save money by exposing the structure. If you choose this route, budget for professional duct cleaning based on your specific usage and local air quality requirements. Dust buildup here isn’t just an eyesore; it triggers air quality complaints from staff. If your ventilation system is older, stick to closed ceilings to hide unsightly equipment and reduce maintenance labor. Details that define professional quality Precision in the grid layout Experienced installers always start the grid layout from the center of the room. This ensures that the tiles at the opposite walls are the same size, which creates a balanced look. Beginners often start at one wall, which leaves a tiny, awkward sliver of tile on the opposite side. This mistake is hard to hide and makes the room feel uneven. Managing the structural load You must never hang heavy equipment, like large light fixtures or speakers, directly from the ceiling tiles. Every heavy item needs its own independent support wire attached to the building structure above. Solving common ceiling issues What you notice What it means What to do first How to stop it Sagging tiles High humidity Check HVAC vents Use moisture-resistant tiles Yellow stains Roof leak Inspect above tiles Fix the roof source Rattling noise Loose grid Tighten cross tees Use hold-down clips Visible dust Poor filtration Clean air ducts Install high-grade filters Regulations and safety standards Commercial ceilings must meet strict fire-resistance standards set by local authorities. These ratings ensure the material doesn’t contribute to smoke spread during a fire. You can verify the fire rating of any tile by checking the manufacturer’s technical data sheet on their official website. Always check with your local fire marshal before starting. They may
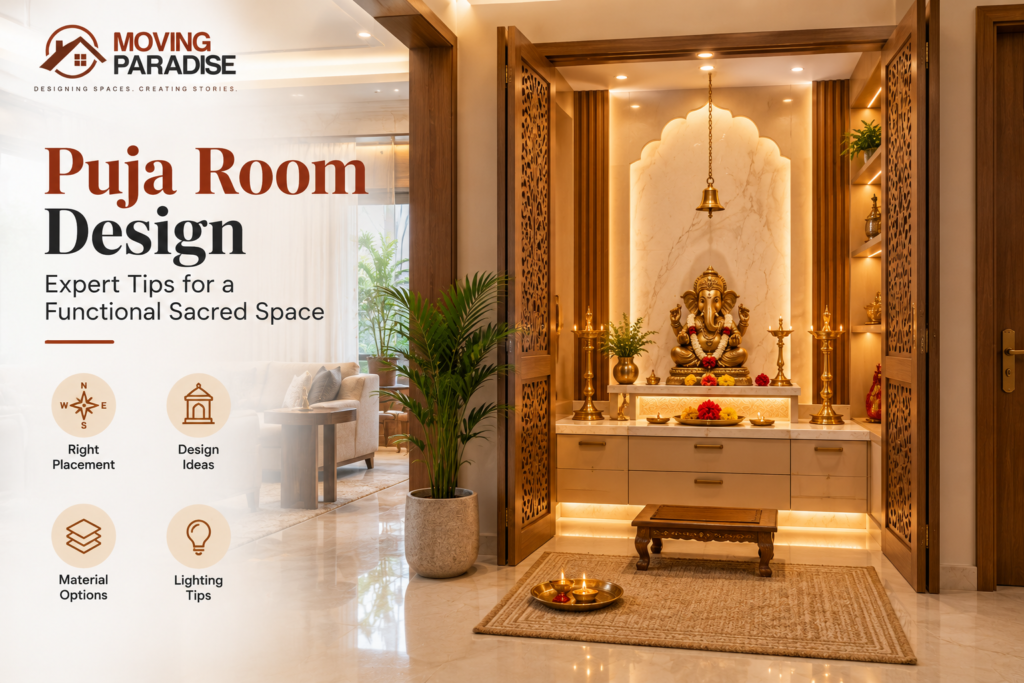
A functional puja room design relies on choosing a quiet, elevated space that faces east or north to align with traditional architectural principles. You must select materials that are easy to clean, such as marble, granite, or polished wood, to maintain the sanctity of the space. When you prioritize airflow and soft, warm lighting, you create a peaceful environment for daily practice. The key to success is balancing your available square footage with the necessary storage for idols, lamps, and offerings, ensuring the area remains clutter-free and visually distinct from the rest of your home. Standard styles for prayer spaces Every home requires a different approach to sacred space, so choosing the right layout depends on your floor plan and personal preference. This table summarizes the most common styles seen in modern residential architecture today. Style Name Best Used For Common Example Wall-mounted Small apartments Wooden shelf unit Cabinet style Hiding contents Closed wooden cupboard Room partition Open floor plans Laser-cut wood screen Dedicated room Large homes Separate marble chamber Niche layout Built-in spaces Recessed wall opening If you have less than four square feet of floor space, choose the wall-mounted style. Placing these units at eye level prevents them from becoming cluttered catch-alls for mail or keys. For high-traffic areas, use a cabinet style to protect items from dust and curious pets. If you choose a room partition, ensure the screen is at least six feet tall to create a true psychological boundary. Avoid placing any prayer space directly against a shared wall with a bathroom. This placement often disrupts the quiet atmosphere required for reflection. If your home lacks a dedicated room, prioritize a niche layout in a hallway corner to maintain a sense of seclusion. Wall-mounted shelves A wall-mounted shelf is an ideal solution for compact homes where floor space is limited. It suits individuals who want a dedicated prayer area without blocking movement in hallways or bedrooms. Provides an elevated platform that keeps sacred items safely away from pets or small children. Allows for better use of vertical wall space in areas that would otherwise remain empty. Creates a focal point in a room without the need for major structural renovations or expensive carpentry. If your wall is made of drywall, use toggle bolts rather than standard plastic plugs. Plastic plugs often pull out under the constant pressure of heavy wood and metal idols, causing the shelf to sag or collapse. For a masonry wall, drill directly into the brick or concrete using a carbide-tipped bit for stability. Mount your shelf at eye level, roughly 5 feet from the floor, to ensure comfortable access. If you perform rituals while seated on the floor, lower the shelf to 3 feet. Always check for hidden electrical wires using a stud finder with a voltage detection feature before you drill into any wall surface. Cabinet style units Cabinet style units are perfect for homeowners who prefer a clean, minimalist look when they aren’t actively using the space. These units hide your idols and lamps behind doors, which protects them from household dust and maintains a tidy appearance in the living room or study. Offers secure storage for incense, oil, and prayer books inside built-in drawers. Prevents accidental contact with items, which is helpful in households with high foot traffic. Features doors that can be closed to separate the spiritual space from the rest of the home. If you choose a wooden cabinet, ensure it’s treated for moisture resistance, as the National Wood Flooring Association notes that humidity can cause natural materials to warp over time. Place the cabinet in a corner where it won’t be bumped by passing people. A standard unit is usually 24 inches wide and 18 inches deep, providing enough surface area for a small water vessel and a lamp. Room partition designs A partition design works well for open-plan layouts where you want to define a specific zone for prayer without building a solid wall. This style suits those who need a visual barrier to block out distractions while maintaining the flow of light and air throughout the house. Uses materials like glass, wood, or metal screens to create a sense of privacy. Maintains an open feel by allowing light to pass through the gaps in the design. Provides a flexible boundary that can be moved or adjusted if you renovate your home later. If you’re using a wooden screen, consider the weight of the piece, as floor-to-ceiling panels can be heavy and may require ceiling brackets for safety. You can also use a freestanding folding screen if you’re renting your home and can’t make permanent changes. The U.S. Consumer Product Safety Commission emphasizes that any tall furniture or partition must be anchored to prevent tipping if someone leans on it. Niche layout ideas A niche layout utilizes existing architectural gaps in your home, such as a recessed wall or a converted closet. This style is best for people who want to maximize every inch of a small room by turning an awkward corner into a functional, beautiful focal point. Saves significant space by utilizing the thickness of the wall for your display. It provides a natural frame for your idols, making them the clear center of the area. It also allows for creative lighting, like hidden LED strips behind the edge of the niche. Check if the wall is load-bearing before cutting into it. If you see electrical wires or plumbing pipes running through the stud bay, stop immediately. You must relocate these utilities before proceeding to avoid a costly fire or water hazard. A depth of 12 inches is usually sufficient for most standard idols and a small lamp. If your wall cavity is shallower than 4 inches, use the space for flat art or mirrors instead of shelving. This prevents the niche from feeling cramped or cluttered. Always prioritize structural integrity over aesthetic gain when selecting your wall location. Other popular prayer space options Floating platforms: These minimalist units

A modular kitchen design in Kolkata is inexpensive relative to the alternative for a standard 8×10 foot space, depending on the materials and brand you choose. Installation usually takes 2 to 4 weeks once the factory finishes making the cabinets. This guide covers material choices that survive the city’s humidity, layout rules for narrow apartments, and the exact steps to plan one without overpaying. What a modular setup actually means A modular kitchen uses factory-made cabinet units called modules. Each module is a separate box with its own door, drawer or shelf. You put these boxes together like building blocks to fit your room’s shape. This setup works well for apartments in areas like Salt Lake, New Town or older buildings in South Kolkata where floor space is tight. The factory cuts the boards with machines, so the edges stay straight and the finish stays smooth even when the air gets very damp during the monsoon. The biggest misconception is that “modular” means cheap or temporary. It doesn’t. The price depends entirely on the board inside and the finish outside. A basic particle board unit costs far less than a marine plywood one, but it won’t last as long near a sink. If your kitchen is smaller than 60 square feet, go with an L-shaped layout. If it’s larger and you want a dining spot inside, a U-shape with a breakfast counter works better. The modules themselves don’t change; only their arrangement does. Planning your modular kitchen step by step Getting the layout right before you order anything saves money and avoids delays. Follow these steps in this exact order. Measure the room. Note the length of every wall, the height from floor to ceiling, and the exact position of the water pipe, gas line and electrical points. Measure twice. Pick your layout shape. Use an L-shape for rooms under 60 square feet. Use a U-shape or parallel galley for rooms over 80 square feet. Leave at least 36 inches of walking space between opposite counters. Choose the core board. For base cabinets near the sink, use BWP (Boiling Water Proof) marine plywood. For upper wall cabinets away from water, you can use high-density MDF to save money. Select the outer finish. Acrylic gives a glossy look but shows fingerprints. Laminate is cheaper and hides scratches better. In Kolkata’s humid climate, avoid raw wood veneers near the cooking area because moisture warps them. Plan the work triangle. Keep the sink, stove and refrigerator within 4 to 9 feet of each other. Don’t put the stove directly next to the sink; leave at least 24 inches of counter space between them for food prep. Finalize the hardware. Choose stainless steel hinges and soft-close channels. Cheap iron hinges rust quickly here because of the moisture in the air. Confirm the factory timeline. Manufacturing usually takes 15 to 21 days. On-site assembly takes another 3 to 7 days. Don’t start breaking your old kitchen until the new modules arrive at your building. The single judgment call that separates a good result from a bad one is where you spend your budget. Put the most money into the boards and hinges, not the fancy handles. If the inner board swells, no handle will save the cabinet. Modular kitchen sizes and costs in Kolkata These figures assume a standard 8×10 foot kitchen using mid-range laminate finishes and BWP plywood for base units. Prices shift based on the brand you choose and the exact floor plan of your apartment. Situation What to use How long What to watch for Small apartment under 60 sq ft L-shape layout, MDF upper cabinets 15-20 days total Ensure 36 inches of clear walking space remains Standard 8×10 foot room U-shape or parallel, full BWP plywood 20-30 days total Check if the gas pipeline needs shifting first Large villa over 120 sq ft Island layout, acrylic or glass finish 35-45 days total Verify floor load capacity for heavy stone counters Rental property upgrade Basic particle board, simple laminate 10-15 days total Don’t overspend; landlord might not replace later Heavy daily cooking (fish frying) Stainless steel countertops, tall chimneys 25-35 days total Chimney duct must vent outside, not into a shaft For the large villa option, allow about half as long again for manufacturing because custom island units require extra framing. Always ask the dealer for a written breakdown showing the cost per module, not just a lump sum. Details that make or break the final result Experienced planners in Kolkata always check the ventilation route before they finalize the chimney hood. They don’t just measure the walls; they measure the window frame depth too. If the window opens inward, an upper cabinet placed right next to it will block the glass. They leave a 4-inch gap or use a shorter cabinet there. The order of installation matters heavily. The plumbing and electrical work happens first, followed by the wall tiles, then the false ceiling if you have one, and finally the kitchen modules. Bringing the cabinets in before the wet work finishes ruins the factory polish. Moisture from fresh cement or tile adhesive settles on the laminate and causes white spots. During assembly, a good technician checks the level of the floor before fixing the base legs. Older buildings in North Kolkata often have uneven floors. If the base isn’t leveled with adjustable legs, the doors won’t close flat, and the countertop might crack under pressure later. They also leave the back panel slightly loose rather than nailing it tight against the wall. This small gap allows air to move behind the cabinet, which stops mold from growing during the July and August rains. Skipping this gap traps moisture directly against the plywood. Troubleshooting common installation problems Things sometimes go wrong during or right after the setup. Here is how to match what you see to the actual cause. What you notice What it usually means What to do first Cabinet doors don’t align Base legs weren’t leveled on an

A good walk in closet design needs at least 6 feet of depth, 24 inches for hanging rods, and 14 to 16 inches between shelves. It’s built around the clothes you own, not a magazine picture. This guide covers the layout steps, shelf spacing, lighting choices, and the clearances that decide if it actually works day to day. What a fitted closet space really is It’s a room or alcove built to store clothes on open rods and shelves instead of behind doors. You step inside it, which is why the depth matters more than the width. It’s for anyone who has outgrown a reach-in wardrobe and needs daily access to everything without digging through stacks. The one thing people get wrong is treating it like a small bedroom. A bedroom holds furniture; this space holds inventory. Every inch needs a job. The mechanism is simple: gravity keeps hangers vertical, so the rod height decides what fits below it. Long coats need about 60 inches from rod to floor, while folded shirts need only 12 inches of shelf space. If your room is under 5 feet deep, you can’t put hanging rods on both sides and still walk down the middle. In that case, use one wall for hanging and the opposite wall for shallow shelving. You’ll find exact clearance rules in the NKBA planning guidelines, which set the standard for built-in storage spaces. How to lay out a walk in closet You don’t start by buying bins or picking paint colors. You start with the walls and work inward, measuring twice before you drill anything. Measure the room’s length, width, and ceiling height in inches. Write these three numbers down first. Mark a 36-inch wide path down the center or along one side. This is your walking space, and you can’t shrink it. Install the top hanging rod 80 to 84 inches from the floor. This leaves room for long dresses and coats underneath. Add a second rod 40 to 42 inches from the floor for shirts and pants. That gives you double hanging in the same spot. Mount shelves 14 to 16 inches apart. Anything wider wastes space; anything tighter crushes folded sweaters. Leave 24 inches of depth for every hanging section. Standard hangers are 17 inches wide, and they need clearance from the back wall. Place shoe racks or cubbies near the door. You grab them last, so keep them out of the deep corners. Add a light source above each rod. LED strips running along the shelf edge work better than one ceiling bulb. The single judgment call is where to put the tall items. If you have more coats than shirts, give the long-hang section the prime corner. If you wear mostly folded knits, trade that tall space for extra shelving. Getting this wrong means you’ll end up stacking winter coats on the floor because the rods don’t match your actual wardrobe. Walk in closet measurements and spacing These are the figures you’ll check while you’re holding a tape measure and a pencil. They assume standard adult clothing and an 8-foot ceiling. Situation What to use How long What to watch for Double hanging (shirts/pants) Two parallel metal rods 40 inches between rods Bottom clothes dragging on shoes below Long hanging (coats/dresses) Single top rod 60 to 64 inches to floor Rod bowing in the middle past 48 inches wide Folded sweaters and jeans Flat wood or wire shelves 14 to 16 inches apart Stacks leaning forward and falling over Center aisle for walking Clear empty floor space 36 inches minimum width Doors or drawers hitting the opposite wall Shoe cubbies Angled or flat dividers 8 inches high per pair Heels taller than 5 inches won’t fit flat Top storage for luggage Highest fixed shelf 24 inches from ceiling Too heavy to lift safely without a stool If your ceiling is 9 feet instead of 8, add that extra foot to the top shelf, not the hanging rods. Your arms can’t comfortably reach higher than 84 inches anyway. For wider rooms over 8 feet across, you can run hanging sections on three walls, but keep the 36-inch aisle clear in the center. Getting the details right in closet layouts Preparation decides how the finished space feels. Before you mount anything, pull every piece of clothing out of your current wardrobe and sort it into piles: hang, fold, toss. You build the space for the “hang” and “fold” piles, not for the things you haven’t worn in two years. Work from the top down. Mount the highest shelf first, then the top rod, then the lower rod. If you install the bottom pieces first, you’ll be working over them and scratching the finish. Check the wall studs with a magnetic finder before drilling. Anchors in drywall alone will pull out once a rod holds thirty pounds of winter jackets. Halfway through, stop and hang five shirts on the new rod. Close the door if there’s one. Open the drawers. Does the fabric brush against the opposite wall? If it does, move the rod back an inch now. Fixing it later means patching painted drywall and buying longer brackets. Leave the corners for fixed shelves, not hanging rods. Hangers don’t turn corners well. A 12-inch deep corner shelf holds purses or boxes perfectly, while a rod wrapped around a corner just creates a dead zone where clothes get crushed together. Don’t skip the ventilation. Clothes release moisture, especially after being worn. If the room has no window, leave a half-inch gap under the door or install a small vent grille. Trapped humidity smells musty within a few months. Troubleshooting common closet fitting problems When something doesn’t look or work right, the cause is usually a measurement taken too fast. Here’s how to match the symptom to the fix. What you notice What it usually means What to do first Shirts drag on the shelf below Lower rod is mounted too low Raise the bottom rod 2

Room renovation services handle the whole job for you — planning, permits, materials, trades, and cleanup. For a full standard bedroom or living room, expect roughly 3 to 6 weeks of work. A cosmetic refresh runs 1 to 2 weeks. Small bathrooms and kitchens take longer because plumbing and electrical move. This guide covers what the service actually includes, the real steps, what things cost in time, and when hiring a crew is the wrong move. What renovation services really mean A room renovation service is a company that takes one room from old to finished. It manages design, demolition, materials, skilled trades, and the final inspection. You deal with one contract instead of ten separate workers. People use it for kitchens, bathrooms, basements, and bedrooms. It suits anyone who wants the room done right but doesn’t have the time or the tools to run the job. The biggest misconception is that the service is just labor. In truth, most of the value is coordination — ordering the right materials, sequencing the trades, and catching problems before they get expensive. One rule to understand up front: any change to plumbing, gas, or electrical work usually needs a permit and a licensed professional. That’s not the contractor being difficult. It’s the law in most US states, and unpermitted work can fail an inspection or block a home sale. Your local building department publishes its own permit list, so check there before you sign anything. How a room renovation actually runs The steps below assume a standard mid-size room, roughly 120 to 200 square feet, with no structural changes. A bigger room or a moved wall adds time. A simple repaint and floor swap skips steps 2 through 5. Walkthrough and scope, 1 to 2 hours. The contractor measures the room, checks the walls, floor, and wiring, and writes down what stays and what goes. Written estimate and contract, 3 to 7 days. You get a fixed price or a cost-plus breakdown, a payment schedule, and a start date. Never pay more than a small deposit up front. Permits, 1 to 3 weeks. The contractor files with your city or county. Wait times vary a lot by area, so ask your building department for its current timeline. Demolition and haul-away, 1 to 3 days. Old flooring, cabinets, and fixtures come out. Dumpster fees are usually a separate line item. Rough-in work, 3 to 7 days. Plumbers and electricians run new lines and boxes before the walls close up. This is the stage that must pass inspection. Drywall, paint, and flooring, 5 to 10 days. Walls get patched and painted, then floors go down. Paint needs 24 hours between coats in normal humidity. Fixtures, trim, and final inspection, 2 to 4 days. Sinks, lights, outlets, and baseboards go in, then the inspector signs off. The one judgement call that decides a good job from a bad one is the order of the rough-in. If flooring or cabinets go in before the electrical and plumbing are inspected, you’ll be pulling finished work back out. Ask your contractor to show you the signed inspection card before the next stage starts. If the plan touches gas lines or the main electrical panel, that part isn’t a do-it-yourself job. It needs a licensed electrician or plumber, and in many states a separate permit. Hand that piece to a qualified pro. Renovation services: time and settings at a glance The table below gives typical durations for a mid-size room with no structural changes. Add 1 to 2 weeks if you move a wall or change the layout. Situation What to use How long What to watch for Cosmetic refresh (paint, flooring, trim) One handyman or painter 1–2 weeks Color and floor samples approved before ordering Full bedroom or living room General contractor plus 2–3 trades 3–6 weeks Permit timeline, material lead times Small bathroom (under 50 sq ft) Licensed plumber, tiler, electrician 4–8 weeks Waterproofing behind tile, vent fan ducting Kitchen, layout unchanged General contractor, cabinet installer 5–8 weeks Cabinet and countertop lead times Kitchen with moved plumbing General contractor plus licensed plumber 8–12 weeks Permit inspections, gas line work Basement finish General contractor, egress and code checks 6–10 weeks Egress window rules, moisture control Structural wall removal Engineer, contractor, permits 10–16 weeks Load-bearing status, beam sizing Material lead times are the hidden delay. Cabinets and custom counters can take several weeks to arrive, so confirm the delivery date before demolition starts. Your contractor should give you that date in writing. What separates a clean job from a messy one Experienced crews protect the rest of the house first. They lay floor protection, seal doorways with plastic, and shut off the HVAC vents in the work zone. That one hour of prep saves days of dust cleanup later. They also work in a fixed order and don’t skip inspections. Rough-in gets checked before drywall. Drywall gets checked before paint. Each stage is signed off before the next one starts, because reopening a finished wall costs far more than waiting a day for the inspector. Partway through, a good contractor walks the room with you and confirms the layout — outlet heights, light positions, tile lines. They check these before materials are cut, not after. What they leave alone matters too. Existing hardwood that’s in decent shape gets sanded, not replaced. Original trim gets saved when it can be. Good crews ask before they tear something out, because a replaced detail rarely matches the rest of the house. One more habit: they photograph the open walls before drywall goes up. Those photos show where the pipes and wires run, which saves a lot of guessing the next time you hang a shelf or drill a hole. Common problems and quick fixes Most complaints trace back to one of a few causes. The table matches what you notice to what it usually means and the first thing to do. What you notice What it usually means What to do

The best home renovation in kolkata starts with three numbers: your budget, your flat’s age, and your society’s written rules. Most Kolkata flats need 6–10 weeks of work for a full 2BHK renovation, and civil work can’t start until your housing society approves it in writing. That approval is where schedules actually break. Many older buildings in Ballygunge, Salt Lake and Behala restrict drilling and demolition to fixed daytime hours, so a job quoted at 8 weeks can run to 12 if your contractor never asked. Get the society’s no-objection letter before you pay a single booking advance. If the flat is old, budget for rewiring and plumbing replacement even when the walls look fine. This guide covers the real steps, the costs that surprise people, and when to walk away. What renovation means here Home renovation in Kolkata means repairing and upgrading an existing flat or house — kitchen, bathrooms, flooring, wiring, plumbing, painting — rather than building new. It’s for owners and long-term renters who plan to stay at least three years. The one misconception people bring: that renovation is mainly about looks. It isn’t. In older buildings, most of the money goes into things you’ll never see — waterproofing, electrical load, and pipe replacement. One rule matters more than any design choice. In a co-operative housing society, structural changes and even some internal work need the managing committee’s prior written approval. In a co-operative housing society, this approval is required by the society’s own bye-laws. If you skip this step, your society can stop the work mid-way and you’ll pay for undone labor. Always ask your secretary for the approval process in writing before you sign any contractor agreement. How to plan and run the renovation Get society approval first. Submit your plan and pay any refundable deposit the society asks for. Wait for written permission — this usually takes 1–3 weeks. Fix your budget in writing. Split it roughly 60% materials, 25% labor, 15% buffer. For a 2BHK, a mid-range full renovation in Kolkata typically runs several lakh rupees; get three itemized quotes and compare line by line, not totals. Hire a licensed electrical contractor. Kolkata’s electricity supply comes through CESC or WBSEDCL depending on your area, and any load upgrade application must go to your actual distribution company. Ask your contractor which one serves your pin code. Do the messy work first. Demolition, plumbing, and electrical rewiring happen in weeks 1–3. Flooring and tiling follow in weeks 3–5. Painting and carpentry come last. Test waterproofing before tiling. Fill the bathroom floor with water and leave it 24 hours. Check the ceiling below. Only then lay tiles. Inspect at three checkpoints. After wiring, after plumbing, and after waterproofing. Photograph everything before it’s covered up. Hold back 10% payment until a final walkthrough, usually 7–10 days after handover. The single judgement call: sequence. Contractors who tile before finishing plumbing cause the most rework, and rework costs both money and weeks. If your flat is old, replace pipes and wiring rather than patch them; if it’s relatively new, patching is often fine. Key numbers at a glance These figures assume a standard 2BHK of about 800–1,000 sq ft. Larger flats scale up roughly in proportion; smaller ones cost slightly more per sq ft because fixed costs don’t shrink. Situation What to use How long What to watch for Full 2BHK renovation Licensed contractor, itemized quote 6–10 weeks Society approval delay Kitchen only Modular units, new plumbing 2–3 weeks Water line position Bathroom only Waterproofing, tiles, fittings 2–3 weeks Leakage to flat below Electrical rewiring Licensed electrician, ISI-marked wire 1–2 weeks Load capacity for ACs Painting only Interior emulsion, 2 coats 5–7 days Damp patches on walls Older building (20+ years) Full pipe and wire replacement 10–14 weeks Hidden structural issues Monsoon timing Avoid external work — Rain delays, damp What separates good work from bad Experienced renovators prepare before anyone lifts a hammer. They photograph every wall, take measurements, and mark where old wiring and pipes run. They also confirm the exact tile and paint batch numbers before ordering, because a second batch of the same tile can differ slightly in shade — and matching it later is expensive. They work in one direction, room by room, finishing each space before moving on. This keeps dust contained and lets you live in part of the flat. They check partway through: after wiring, they test every socket and switch; after plumbing, they run every tap and check for drips for a full day. What they leave alone matters just as much. Original structural walls, load-bearing beams, and the building’s external facade stay untouched. Drilling into a load-bearing wall without an engineer’s approval is where serious problems start. The paperwork habit Keep every bill, warranty card, and contractor receipt in one folder. When you sell or rent the flat later, buyers ask about renovation age and warranty on fittings. A missing warranty card can cost you a free replacement. The timing habit Schedule the noisiest work — demolition and drilling — for weekday daytime hours. Kolkata societies usually restrict loud work to specific hours, and neighbors will complain if you ignore this. Common problems and fixes Most renovation problems trace back to one of a few causes. Here’s how to match what you notice to what to do first. What you notice What it usually means What to do first Damp patch on wall Water seepage from outside or a leaking pipe Find the source before painting over it Tiles lifting after a month Poor adhesive or no waterproofing base Stop payment, call contractor back Lights flickering Loose connection or overloaded circuit Switch off, call a licensed electrician Water pooling in bathroom Wrong floor slope Re-lay tiles before final payment Paint peeling in monsoon Damp wall or cheap primer Fix damp, then repaint with primer Cracks near door frame Settlement or structural movement Get a structural engineer’s opinion The rules that apply Kolkata renovations sit under several authorities. Your

A comfortable, well-organized bedroom doesn’t require a big budget or a big house. For a simple bedroom design for middle class family, the goal is calm, storage, and durability at a price that leaves room in the monthly budget. Most families can refresh a standard 10×12-foot room for somewhere between $400 and $2,500, depending on how much furniture they replace and whether they hire help. The ideas below focus on what actually works in real homes: smart layouts, affordable materials, and small changes that make a room feel finished rather than crowded. Key Takeaways Photo: www.tostemindia.com on Google Start with layout, not shopping. Measure the room and mark door swings before buying anything; a wrong-size bed wastes more money than a cheap one. Set a realistic budget band. A cosmetic refresh runs $400–$900; a full furniture replacement runs $1,500–$2,500 for a standard room. Buy storage that goes vertical. Tall wardrobes and under-bed bins add more usable space than wide, low furniture in small rooms. Choose washable, neutral textiles. They hide wear, survive kids, and stay in style for years. Light in layers. One ceiling bulb flattens a room; a ceiling light plus two lamps changes the whole feel for under $80. Skip trends that date fast. Bold accent walls and themed bedding cost money and look tired within two years. Simple Bedroom Design Layout for Middle Class Families The most common and expensive mistake is buying furniture first and figuring out where it goes later. A bedroom has fixed obstacles — doors, windows, closets, outlets — and the bed has to work around all of them. Measure these five things first Wall lengths from corner to corner, at floor level. Door swing — how far the door opens into the room. Window position and sill height, so a headboard or dresser doesn’t block light. Closet door type — hinged doors need clearance; sliding doors do not. Outlet and switch locations, so lamps and chargers reach without extension cords. Sketch the room on graph paper at a scale of one square equals one foot. Cut paper rectangles for the bed, wardrobe, and dresser, and move them around until the room “walks” well. You want at least 24 inches of clear walking space between the bed and any wall or furniture. The three layouts that work in small rooms Layout Best for Watch out for Bed centered on the longest wall Square rooms, couples Leaves less room for a desk Bed in a corner Very small rooms, single sleepers One side is hard to make Bed under the window Narrow rooms Drafts and curtain clearance Pro Tip: If the room is under 100 square feet, put the bed against the longest uninterrupted wall and treat the space at the foot of the bed as your only open floor. Everything else lines the walls. Set a Budget You Can Actually Keep Middle-class budgeting is about trade-offs, not deprivation. Decide up front which category you’re in, then protect that number. Scope Typical cost What it covers Cosmetic refresh $400–$900 Paint, bedding, curtains, lamps, rug, hardware Partial upgrade $900–$1,500 Above plus a new mattress or one furniture piece Full replacement $1,500–$2,500 Bed frame, mattress, wardrobe, dresser, lighting, textiles A few rules that keep costs down without looking cheap: Spend on the mattress, save on the frame. You use the mattress every night; a simple metal platform bed does the same job as an upholstered one. Paint is the cheapest transformation. One gallon covers a standard room and costs far less than new furniture. Buy solid wood secondhand. A used solid-wood dresser outlasts a new particleboard one at the same price. Wait for seasonal sales on mattresses and storage, typically around major holiday weekends. Pick Furniture That Earns Its Space Every piece in a small bedroom should do at least two jobs. Beds with built-in storage A bed frame with drawers underneath replaces a dresser in tight rooms. Platform beds with under-bed drawers typically run $150–$400 and hold off-season clothing, extra bedding, or kids’ toys. If you already own a bed, plain rolling under-bed bins cost $10–$25 each and do nearly the same job. Wardrobes and closets If the closet is small, a tall wardrobe beats a wide one. A two-door wardrobe around 72 inches tall uses vertical space and fits in a corner. Look for: Adjustable shelves so the layout can change as needs change. A hanging rod at two heights for short items like shirts and folded stacks. Soft-close or simple sliding doors to save floor clearance. Nightstands and desks In a tight room, a small wall-mounted shelf can serve as a nightstand. If a child needs a study spot, a floating desk mounted to the wall frees the floor underneath for a chair that tucks away. Choose Materials That Survive Real Life A family bedroom takes a beating. Choose finishes for durability first, looks second. Paint: Eggshell or satin finish wipes clean; flat paint shows every scuff. Flooring: If you have carpet, a low-pile or washable rug on top is easier to clean than wall-to-wall in a kid’s room. Bedding: Cotton or cotton-blend sheets wash well and breathe better than polyester. Curtains: Machine-washable panels with a simple rod cost less than custom blinds and block light effectively. Warning: Avoid high-gloss paint on large walls in a bedroom. It reflects light harshly and shows every imperfection in the drywall. Light the Room in Layers Photo: mytyles.com on Google One overhead fixture is the fastest way to make a bedroom feel like a utility room. Three light sources fix it. Layer Purpose Typical cost Ceiling light General illumination Already installed Bedside lamps Reading, winding down $20–$60 each Accent (clip light, LED strip, small floor lamp) Warmth, depth $10–$40 Use warm white bulbs (around 2700K) in a bedroom. Cool white light is fine for kitchens and garages but reads as clinical in a room meant for rest. A dimmer switch, if your wiring allows, is one of the highest-value upgrades you can make.
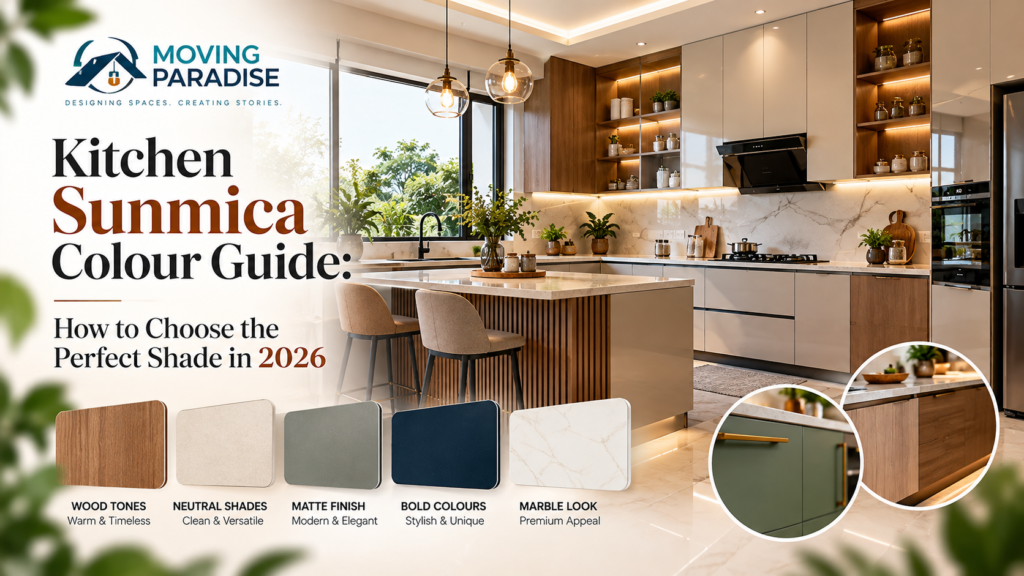
Selecting the right kitchen sunmica colour depends on your space’s size, the amount of natural light available, and how often you plan to clean your surfaces. Light tones like white, cream, or light grey make small kitchens look bigger, while dark shades like charcoal or navy add a modern, premium feel to larger areas. Laminates, commonly known as sunmica, are durable surface materials that come in many textures, but the visual impact of your kitchen relies heavily on how these hues interact with your flooring and lighting. Trending kitchen sunmica colour styles Choosing a finish is as important as picking a shade, as it affects both the look and the daily maintenance of your cabinetry. Laminate Finish Best For Typical Example Matte Hiding fingerprints Solid charcoal grey Glossy Reflecting light Bright white gloss Textured Mimicking wood Light oak grain Metallic Modern accents Brushed copper effect Solid Color Minimalist designs Deep navy blue High-gloss surfaces amplify natural light, making small kitchens feel twice as large, but they demand daily wiping because every smudge shows. If you have young children or pets, choose a matte or textured finish to mask inevitable sticky fingerprints and minor scratches. Check for glare before committing. If your kitchen receives direct afternoon sun, glossy cabinets will create blinding reflections that make the space uncomfortable. In that case, opt for a satin or matte finish to soften the light. Many homeowners mistake texture for durability, but deep grooves often trap grease. Use a simple rule: if your stove lacks a powerful vent hood, stick to smooth finishes for easier cleaning. Matte finish laminates Matte laminates are popular because they don’t reflect light, which helps hide smudges, fingerprints, and minor scratches that often appear in busy kitchens. This finish suits families with young children or those who prefer a soft, non-reflective aesthetic that feels warm and inviting. Matte surfaces are easier to maintain than high-gloss options because they don’t show every water droplet or streak. They provide a sophisticated, flat appearance that pairs well with industrial or farmhouse kitchen themes. The lack of glare makes them ideal for kitchens with many windows or strong overhead artificial lighting. These laminates are resistant to the wear and tear of daily cooking, staying consistent in appearance over many years. You can clean them with a soft cloth and mild soap, avoiding the need for specialized polishing products. If you have a large kitchen, a dark matte color like slate grey creates a grounding effect. You might use this on lower cabinets while keeping upper units in a lighter shade to balance the weight of the room. High-gloss finish laminates High-gloss laminates are designed to reflect light, which visually expands the size of a cramped or narrow kitchen space. These are best for homeowners who love a sleek, contemporary, and high-energy environment. While they look stunning, they require more frequent wiping, as the reflective surface highlights dust, grease, and fingerprints much more clearly than matte alternatives. The reflective quality mimics the look of glass or polished stone, elevating the luxury feel of your cabinetry. Glossy surfaces are very easy to wipe down because the smooth finish prevents dirt from clinging to the material. They work best in kitchens that lack natural sunlight, as they bounce whatever light is available around the room. The vibrant color depth achieved with gloss makes bold choices like red or bright yellow stand out significantly. For a modern apartment kitchen, a high-gloss white laminate is a classic choice. It keeps the area feeling airy and clean. When installing, ensure your National Kitchen and Bath Association guidelines for workspace clearance are met so your high-gloss cabinets remain protected from heavy impacts. Textured and wood-grain laminates Textured laminates bring the warmth of natural materials into the kitchen without the high maintenance requirements of real wood. They’re perfect for people who want a rustic or organic vibe but need the water resistance and durability of a synthetic surface. These laminates often feature deep grooves or patterns that simulate the look of oak, walnut, or pine, offering a tactile experience that flat colors can’t provide. The texture helps disguise dust and small scratches, making it a practical choice for high-traffic areas. These finishes add visual interest to a kitchen that might otherwise feel too sterile or clinical. They pair beautifully with stone countertops, creating a balanced mix of natural and engineered textures. Wood-grain patterns are timeless, meaning your kitchen will likely stay in style longer than with trendy, bright solid colors. If you choose a heavily textured laminate, be aware that grease can sometimes collect in the deeper grooves. You’ll need to use a soft-bristled brush occasionally to keep those areas clean. Metallic and patterned finishes Metallic laminates are the bold choice for those wanting to create a focal point, often used on island units or as accent panels. These finishes provide a shimmering, high-end look that catches the eye and adds depth to a room. Unlike standard solid colors, metallic or patterned sheets often cost more and require careful installation to ensure the pattern aligns perfectly across cabinet doors. They create an instant “wow” factor, transforming a standard kitchen into a custom, designer-looking space. Metallic tones like gold, copper, or brushed aluminum work exceptionally well with dark cabinet colors. Patterned laminates, such as those mimicking concrete or marble, provide the aesthetic of expensive materials at a fraction of the cost. These finishes are generally as durable as standard laminates, resisting heat and moisture under normal cooking conditions. Because metallic surfaces can look overwhelming, use them sparingly. A common mistake is covering every surface in a reflective metallic finish, which can make a kitchen feel chaotic. Instead, use these as accents on a single wall or a kitchen island to keep the design balanced and visually appealing. Other laminate options for your space Solid Primary Colors: Bright blues, greens, or yellows suit playful, energetic kitchen designs. Use these if you have neutral walls and want your cabinets to be the main
Tell us a little. Our designer will call you back.
No spam. Your details are used only to contact you about your interior.